21. Purchasing: Requisitions, POs & Suppliers (Pro)
Ask for material, order it from your supplier, receive it into inventory, and record what you owe.
Note: Purchasing features require an active Pro subscription.
21.1 How Purchasing Works
Buying material in Stone Project runs through four steps. Each one is a separate record, and each one hands off to the next:
| Step | What it means | Who usually does it |
|---|---|---|
| 1. Requisition | "We need this material." A request, not an order. | Anyone on the team |
| 2. Purchase Order | "We are ordering this from you." Sent to the supplier. | Owner, admin, or buyer |
| 3. Receiving | The truck arrives. Each slab becomes a piece in your inventory. | Shop / warehouse |
| 4. Vendor Bill | "We owe the supplier this much." Your payable. | Office / bookkeeping |
A requisition is a shopping list waiting for a yes. A purchase order is a commitment to a specific supplier at a specific price. You can only turn an approved requisition into a purchase order, and a purchase order always belongs to exactly one supplier.
Where to find each one: the sidebar has a Procurement section with Purchase Requisitions, Purchase Orders, and Vendor Bills. Suppliers lives in the Inventory section of the sidebar.
Starting from a job?
If you already know which project the material is for, skip the blank form. Open the project and use Procure Materials — it reads the drawing and builds the list for you. See 21.15 Procure Materials from a Project.
21.2 Creating a Requisition
- Go to Purchase Requisitions.
- Tap the + button (or New Requisition in the empty state).
- Fill in the header:
| Field | Description |
|---|---|
| Priority | Low, Normal, High, or Urgent — sets the flag color the approver sees in the list |
| Project | Optional. Links the request to a job so the material can be traced back to it |
| Needed By | The date you need the material in the shop |
| Reason | Why you need it (e.g., "Slab cracked during fabrication") |
| Notes | Anything the buyer should know — brand preference, delivery window, contact person |
- Add one or more items. Tap Add Item for each additional line:
| Field | Description |
|---|---|
| Item Type | Slab, Sink, Faucet, Cooktop, Edge Profile, Adhesive, or Other |
| Description | What exactly you need (e.g., "Calacatta Gold 3cm polished") |
| Quantity | How many units |
| Unit Price | Your estimate. Leave it at 0 if you don't know yet — the buyer fills it in later |
The Estimated Total at the bottom updates as you type.
- Tap Save Requisition.
The requisition is created as a Draft and numbered automatically (REQ-2026-0001, REQ-2026-0002, and so on, restarting each year).
Prices here are estimates
The unit price on a requisition is what you think it will cost. The real price is set on the purchase order, and it does not have to match.
21.3 Requisition Statuses
The requisition detail screen shows a step tracker across the top so you always know where the request stands and what happens next.
| Status | What it means | What you can do |
|---|---|---|
| Draft | Being written. Not visible as a request yet | Edit, submit, delete |
| Submitted | Waiting for approval | Edit, approve, reject, delete |
| Approved | Green light. Ready to be ordered | Assign suppliers, convert to PO, delete |
| Rejected | Turned down, with a reason shown on the record | Delete |
| Converted | A purchase order was created from it | View the PO, delete |
| Cancelled | Dropped | Delete |
Editing the header and line items is only possible while the requisition is Draft or Submitted. Once it is approved, the request is frozen except for the supplier on each item (see 21.5).
Use the filter chips on the list (magnifier icon > status chips) to see only one status at a time.
21.4 Submitting & Approving
Submitting
Open the requisition and tap Submit. Submitting is one-way — it locks the request for approval, so the app asks you to confirm first.
Approving or rejecting
Only owners and admins can approve or reject a requisition. Everyone else can create and submit one, but the Approve and Reject buttons simply do not appear for them.
- Open a Submitted requisition.
- Tap Approve to green-light it, or Reject to turn it down.
- Rejecting requires a reason, which is stored on the requisition and shown in a red panel on the detail screen so the requester knows why.
Auto-approval
Owners can skip the submit-and-approve round trip for their own requests.
- Go to Purchase Requisitions.
- Tap the gear icon in the top bar (visible to owners only).
- Turn on Auto-approve my requisitions.
With this on, a requisition created by an owner or admin is born Approved — no submit step, no approval step, straight to "ready to order". The approval trail is still recorded (who approved it and when), so the history stays auditable.
It only covers owners and admins
Auto-approval does not apply to requisitions created by other team members. Those still go through submit and approval, exactly as before.
21.5 Turning a Requisition into a Purchase Order
An approved requisition becomes one or more purchase orders.
- Open the Approved requisition.
- Check that every line item has a supplier. Each item has a supplier picker right under it; items missing one are flagged with an orange warning.
- Tap Convert to Purchase Order and confirm.
How items are grouped
Items are grouped by supplier — one purchase order per supplier. A requisition with three items from two suppliers produces two purchase orders. Each new PO carries the requisition's project, currency, and a note saying which requisition it came from.
The requisition then moves to Converted and gains a View Purchase Order button.
Every item needs a supplier
If even one item has no supplier, the conversion is refused and nothing is created. This is deliberate: a partial conversion would create POs for some items, lock the requisition as Converted, and leave the rest stranded with no way to order them. Assign a supplier to every item first — the Convert to Purchase Order button stays disabled until you do.
Where does the supplier come from? When a requisition is built from a project's drawing, the supplier is filled in automatically from the material (the color's own supplier, otherwise the material's preferred supplier — see 21.12). If the material has no supplier on file, the field is left blank for you to fill in here.
21.6 Purchase Order Statuses
| Status | What it means |
|---|---|
| Draft | Created but not yet sent to the supplier |
| Sent | The supplier has the order |
| Confirmed | The supplier acknowledged it and delivery is expected |
| Partially Received | Some units have arrived, some are still outstanding |
| Received | Everything on the order has arrived |
| Cancelled | Called off |
The Purchase Orders screen opens with a stats bar across the top — Total, Draft, Sent, Received, and Value (the combined total of everything still open, meaning Draft, Sent, and Confirmed). Below it, status chips filter the list, and the icon in the top bar switches between card view and table view.
Purchase orders are numbered PO-2026-0001, PO-2026-0002, and so on, restarting each year.
POs are not created from scratch here
The Purchase Orders screen lists and manages orders; it does not build one from a blank form. A purchase order comes from converting an approved requisition (21.5).
Editing a purchase order
You can change the supplier, tax, notes, and expected delivery date while the PO is Draft or Sent. After that the order is locked — once a supplier has confirmed or material has started arriving, the record has to stay put.
21.7 Sending a Purchase Order to Your Supplier
Open the purchase order. The Actions list shows what you can do at this stage.
Mark as sent
Send to Supplier flips the status from Draft to Sent. Use it when you placed the order some other way (phone, the supplier's own portal) and just want the record to match reality.
Email the PO
Send Email to Supplier opens a composer:
| Field | Description |
|---|---|
| To | Pre-filled with the supplier's email. You can type a different one |
| Subject | Pre-filled with the PO number and your company name |
| Custom Message | Optional note added to the body — a default message is filled in for you |
| CC | Optional. Separate multiple addresses with commas |
A live preview shows exactly what the supplier will receive before you send.
- If you typed an address that is not on the supplier's record, a button lets you save it to the supplier so you don't retype it next time.
- Replies go to you, not to a system mailbox — the reply-to is set to the address of whoever sent it.
- Sending an email from a Draft PO also marks it as Sent.
- Every send is logged. The Email History section on the PO shows each attempt, whether it succeeded or failed, who sent it, and the full message body.
Mark as confirmed
Mark Confirmed moves a Sent order to Confirmed. It records that the supplier acknowledged the order and delivery is expected.
21.8 Receiving Items into Inventory
This is where a purchase order turns into real stock. Receiving is available once the PO is Sent, Confirmed, or Partially Received — you cannot receive against a Draft or a Cancelled order.
- Open the purchase order and tap Receive Items.
- For each line, enter the quantity actually delivered. Lines already fully received are marked as such and can be skipped.
- Record what arrived:
| Field | Description |
|---|---|
| Qty | How many units of this line arrived in this delivery |
| Condition | Good, Damaged, or Wrong Item |
| Length / Width / Thickness | Override the ordered dimensions if the actual slab differs |
| Finish | Override the ordered finish if it differs |
| Bin Number | Where the material is being stored in your shop |
| Notes | Anything worth remembering about this delivery |
| Photos | Optional. Take a photo or pick from the gallery — useful for damage claims |
- Tap Record Receiving.
What happens next
- One inventory piece is created per unit received. Ten slabs received means ten pieces, each with its own barcode. Each piece inherits the material, dimensions, finish, supplier, and the PO's unit price as its purchase price, and starts as Available.
- Anything you did not fill in falls back to the ordered values, then to the material's own specs.
- The PO status updates itself: Partially Received while units are outstanding, Received once every line is complete.
- A confirmation dialog reports how many pieces were added and offers Print Labels, which jumps straight to label printing for the pieces just created.
- If the PO line was tied to a specific slab on a project drawing, the new piece is reserved to that job automatically.
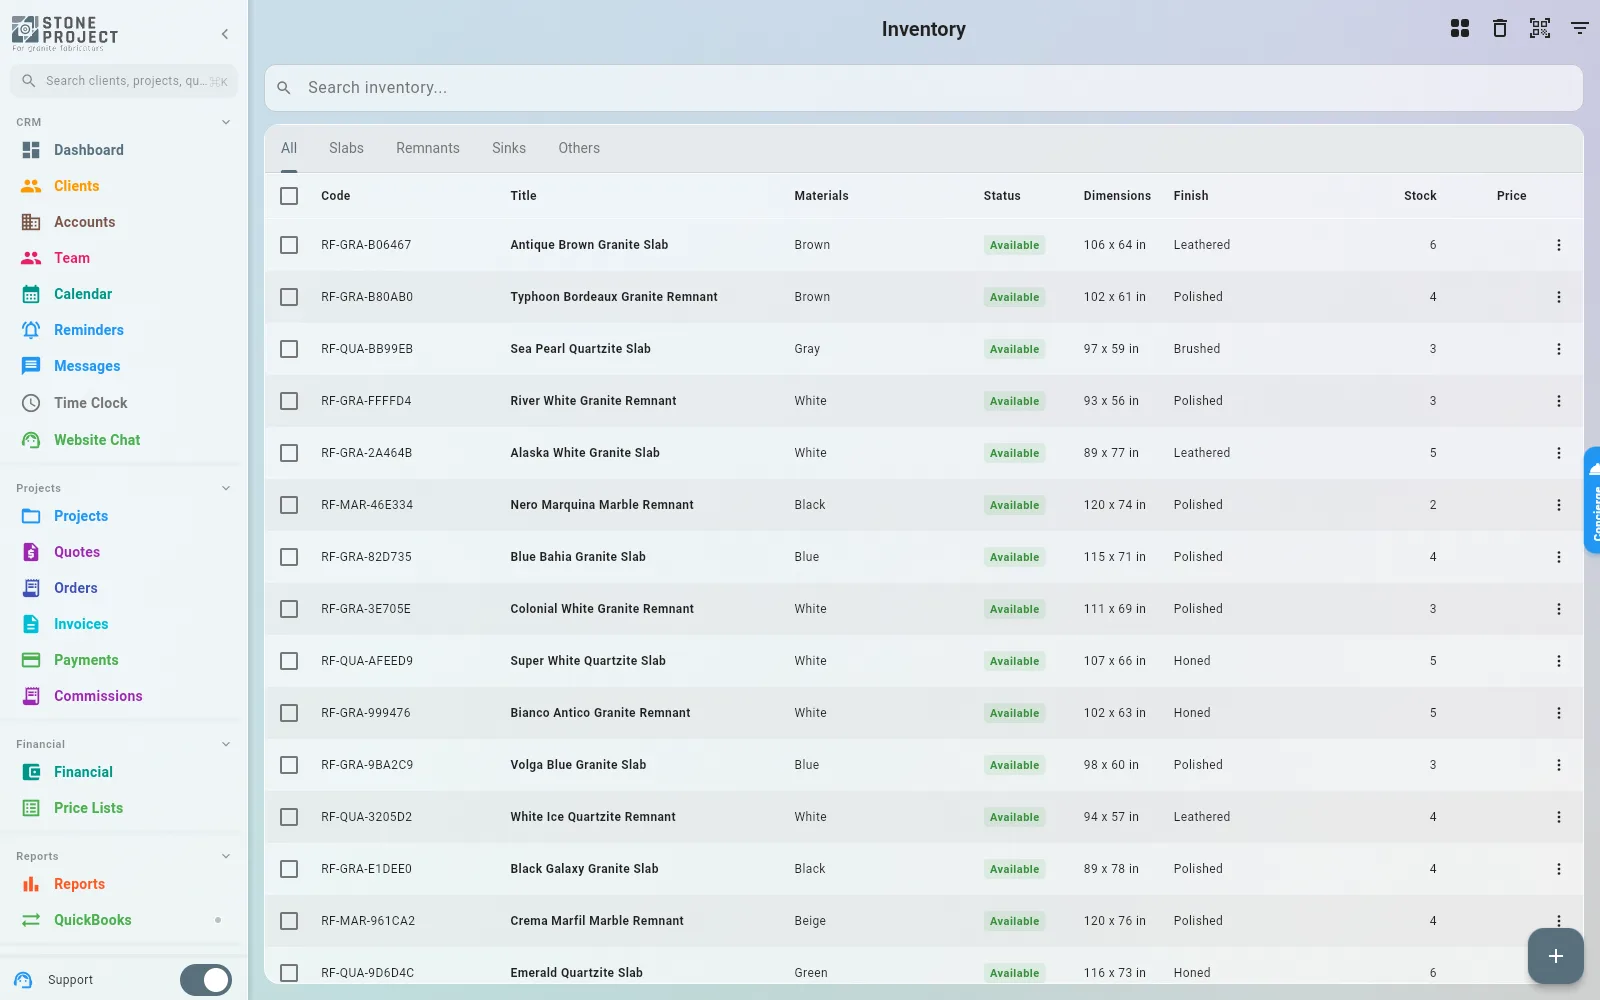
The Receiving History section on the PO lists every delivery — what was received, when, by whom, in what condition.
21.9 Expected Delivery Dates & Late Orders
Set the Expected Delivery date when you create or edit the purchase order (allowed while it is Draft or Sent). It then appears:
- On each PO card, next to a truck icon.
- As its own column in the table view, so you can scan the whole list at once.
- On the PO detail screen, alongside the created, sent, and confirmed dates.
To chase what is running late:
- Go to Purchase Orders and switch to table view.
- Filter by Sent or Confirmed — these are the orders you are waiting on.
- Sort or scan the Expected Delivery column for dates that have already passed.
- Open the late order and tap Send Email to Supplier. The composer opens with the PO details already filled in; write your follow-up in the custom message and send. The chase is logged in the PO's Email History, so you have a record of when you asked.
No automatic late-delivery alert
Stone Project does not send you a notification when a purchase order passes its expected delivery date. Checking the list is a manual step. (Vendor bills do flag themselves as overdue — that is about money you owe, not material you are waiting for.)
21.10 Deleting a Purchase Order
Open the PO and tap Delete Purchase Order, or select several in the list and use Bulk actions > Delete selected.
Deleting a received PO also removes its unused stock
A received purchase order already created inventory pieces, and deleting it takes the untouched ones with it. Read the table below before you delete.
What happens to the pieces the order created:
| Piece | Result |
|---|---|
| Still Available, not reserved, assigned, cut, installed, or on hold | Removed with the purchase order — deleting a test or mistaken order cleans up after itself |
| Already committed to a job — reserved, assigned, cut, or installed | Kept. Deleting paperwork never pulls material out from under an active project |
Two other things happen at the same time:
- Any slab reservations pointing at this order's lines are released and go back to "needs sourcing".
- The requisition this PO came from returns to Approved, so you can fix the supplier or the price and convert it again.
The confirmation dialog spells all of this out before you commit, and deleted purchase orders are recoverable from the Trash.
21.11 Managing Suppliers
Go to Suppliers in the sidebar.
Adding a supplier
- Tap Add supplier. (The button only appears for team members whose role includes the create suppliers permission — see Company Management > Permissions.)
- Fill in the details:
| Field | Description |
|---|---|
| Name | Required. The company name |
| Where purchase orders are sent by default | |
| Phone / WhatsApp | Contact numbers |
| Street Address | Start typing and pick from the address suggestions |
| City / State / ZIP / Country | Filled in automatically from the address, editable |
| Categories | What the vendor supplies. Pick as many as apply |
| Tax ID | The supplier's tax identification number |
| Website | Their site |
| Notes | Payment terms, account number, who to ask for |
| Logo | Optional image, shown on the supplier card |
- Tap Save.
Categories: what the vendor supplies
A supplier list usually mixes very different businesses — slab yards, quartz brands, sink and hardware distributors, tooling and consumables. Categories is how you tell them apart:
| Category | Typical vendor |
|---|---|
| Slabs | Slab yards and stone distributors |
| Quartz / Solid Surface | Engineered surface brands |
| Sinks | Sink and hardware distributors |
| Tooling | Blades, bits, polishing pads, machinery |
| Adhesives / Consumables | Epoxy, color kits, sealers, shop supplies |
| Other | Anything else |
Pick more than one when a vendor spans two — a slab yard that also sells adhesives is both. The categories show in the Category column of the Suppliers list, in the supplier picker, and on the supplier card, and you can filter the list by any of them (including Uncategorized, to find the suppliers still missing one).
Instead of typing it all in
Two shortcuts sit at the top of the form:
- Select from existing suppliers — pick a supplier already on file and copy its details.
- Import from QuickBooks — search your QuickBooks vendors by name and pull one in (see 21.13).
Active and inactive
Every supplier has an Active flag. Turn it off for a supplier you no longer buy from — the record and its purchase order history stay, but the supplier stops cluttering your pickers. Use the filter to bring inactive suppliers back into view when you need them.
Finding a supplier
Tap the filter icon on the Suppliers screen:
| Filter | Options |
|---|---|
| Category | All, any category, or Uncategorized |
| Status | All, Active, Inactive |
| Items | All, With items, Without items |
| City | Any city that appears on your supplier list |
| State | Any state that appears on your supplier list |
| Sort by | Name, City, or number of items — ascending or descending |
Active filters show as chips above the list; tap the x on a chip to drop it, or Clear filters to reset.
Supplier detail
Opening a supplier shows its contact information, how many inventory pieces came from it, the total value of those pieces, the most recent pieces received, and the most recent purchase orders.
21.12 Material Pricing per Supplier
What a supplier charges you for a given material is stored on the material, not on the supplier. This is what lets Stone Project pick the right supplier automatically when you order.
- Go to Price List > Materials.
- Open the material and find its Suppliers section.
- Link one or more suppliers, and for each one record:
| Field | Description |
|---|---|
| Cost Price | What this supplier charges you for the material |
| Lead Time | Days between placing the order and delivery |
| Preferred | Marks this supplier as the default source for the material |
Exactly one supplier per material is Preferred. Marking a new one as preferred clears the flag on the previous one, and removing the preferred supplier promotes the next one on the list.
Why it matters: when a requisition is built from a project's drawing, the supplier on each line is resolved automatically — first from the specific color, then from the material's preferred supplier. Keep this filled in and requisitions convert to purchase orders without a manual supplier hunt.
Linking a supplier straight from a drawing
You do not have to leave the layout editor to do this. In Material & Color, when the chosen color has no slabs in stock, the card shows a Link supplier button — pick a vendor (or create one on the spot) and it is saved on that color, which is the first source the requisition looks at.
Once linked, the card shows Supplier: name with two actions:
| Action | What it does |
|---|---|
| Change supplier | Reopens the picker and points the color at a different vendor |
| Remove supplier link | Clears the color's own link; the material's preferred supplier takes over again |
If the material already has an open purchase order or an open procurement request, both actions name that document and ask before saving. Changing the supplier here does not move an order that is already out — reissue it from the Purchase Orders screen if that is what you need.
A supplier that came from the material's Suppliers section above shows on the card for reference, but Remove supplier link is not offered for it: that one belongs to the price list and has to be cleared there.
21.13 Linking a Supplier to QuickBooks
Once QuickBooks is connected (see Integrations > QuickBooks), suppliers and QuickBooks vendors can be kept in step.
Pushing a new supplier to QuickBooks
When you create a supplier and QuickBooks is connected, a Create on QuickBooks checkbox appears at the bottom of the form. Tick it and the supplier is created as a vendor in QuickBooks at the same time. The option only shows on new suppliers that are not already tied to a QuickBooks vendor.
Pulling an existing vendor in
- On the supplier form, tap Import from QuickBooks.
- Search your QuickBooks vendors by name.
- Pick one — its details fill the form and the supplier stays linked to that vendor.
Purchase orders
An open purchase order has a Sync to QuickBooks action, and a Create Vendor Bill action that turns the order into a payable (see 21.14). Both are available on any purchase order that has not been cancelled.
21.14 Vendor Bills
A vendor bill is the last link in the chain: what you actually owe the supplier.
- Open the purchase order.
- Tap Create Vendor Bill.
- The bill opens pre-filled from the purchase order. Adjust amounts, the supplier's own invoice number, the bill date, the due date, and payment terms.
Once a bill exists, the purchase order shows a Vendor bill exists banner linking straight to it — so you never bill the same order twice by accident. A purchase order can carry more than one bill when a supplier invoices a delivery in parts.
Vendor bills live under Procurement > Vendor Bills and carry their own statuses — Draft, Pending, Approved, Partial, Paid, Overdue, Cancelled, and Disputed. The list has an overdue filter, and overdue bills are highlighted in red.
21.15 Procure Materials from a Project
This is the fastest way to buy exactly what a job needs, and it is the flow most shops use day to day.
- Open the project.
- In the Materials section, tap Procure Materials.
Stone Project reads the project's drawing and builds one row per physical item that still needs sourcing:
- One row per slab. A material needing two slabs gets two rows, labeled "Slab 1 of 2" and "Slab 2 of 2", so each can be handled independently.
- One row per fixture — sinks, cooktops, and other cutouts that represent a real product. Holes with nothing behind them (a faucet hole, an outlet) are skipped; there is nothing to buy.
- Slabs already reserved for this project are left out, so re-opening the screen does not push you into buying twice.
Each row shows:
| Element | What it tells you |
|---|---|
| Material thumbnail | The actual texture, so you can spot a wrong material at a glance |
| Availability chip | "3 slabs available" in green, or "None in stock" in grey |
| Quantity | Editable, in case the drawing's count is not what you want to order |
| Reserve / Buy | Your decision for this row. Reserve is greyed out when nothing is in stock |
| Change piece | On a Reserve row, pick a specific slab from inventory instead of the default |
The suggested decision is filled in for you: Reserve when a free piece exists, Buy when it does not. Availability is counted down across rows, so with two slabs in stock and three needed, two rows default to Reserve and the third to Buy.
- Adjust the decisions and quantities.
- Tap Reserve & Buy.
What happens
- Reserve rows pin a specific in-stock piece to this project. The material is now held for this job and stops showing as available elsewhere.
- Buy rows are collected into a single draft requisition for the project, with the supplier already resolved from each material. You land on that requisition, ready to submit.
- If both kinds are present, you get the reservations and the requisition in one go.
All or nothing
If a piece you tried to reserve was claimed by someone else in the meantime, the whole request is rolled back — no partial reservations, and nothing quietly gets bought instead. The screen reloads with current availability so you can decide again with accurate numbers.
If the drawing has nothing left to source, the screen says so and offers to open a blank requisition instead.
Related
- Managing Pieces — the inventory that receiving feeds
- CRM & Client Management — projects and the Kanban board
- Billing & Invoicing — the money side
- Integrations — QuickBooks setup
- Company Management — roles and who can approve