6. CRM & Client Management (Pro)
Manage your clients, projects, and quotes in one place.
Note: CRM features require an active Pro subscription.
6.1 Overview
The built-in CRM (Customer Relationship Management) helps you:
- Track all your clients and their contact information
- Manage projects from initial inquiry through completion
- Create and send professional quotes
- Organize work with a visual Kanban board
- Maintain project checklists and timelines
Access the CRM from More > Clients or More > Projects.
6.2 Adding & Managing Clients
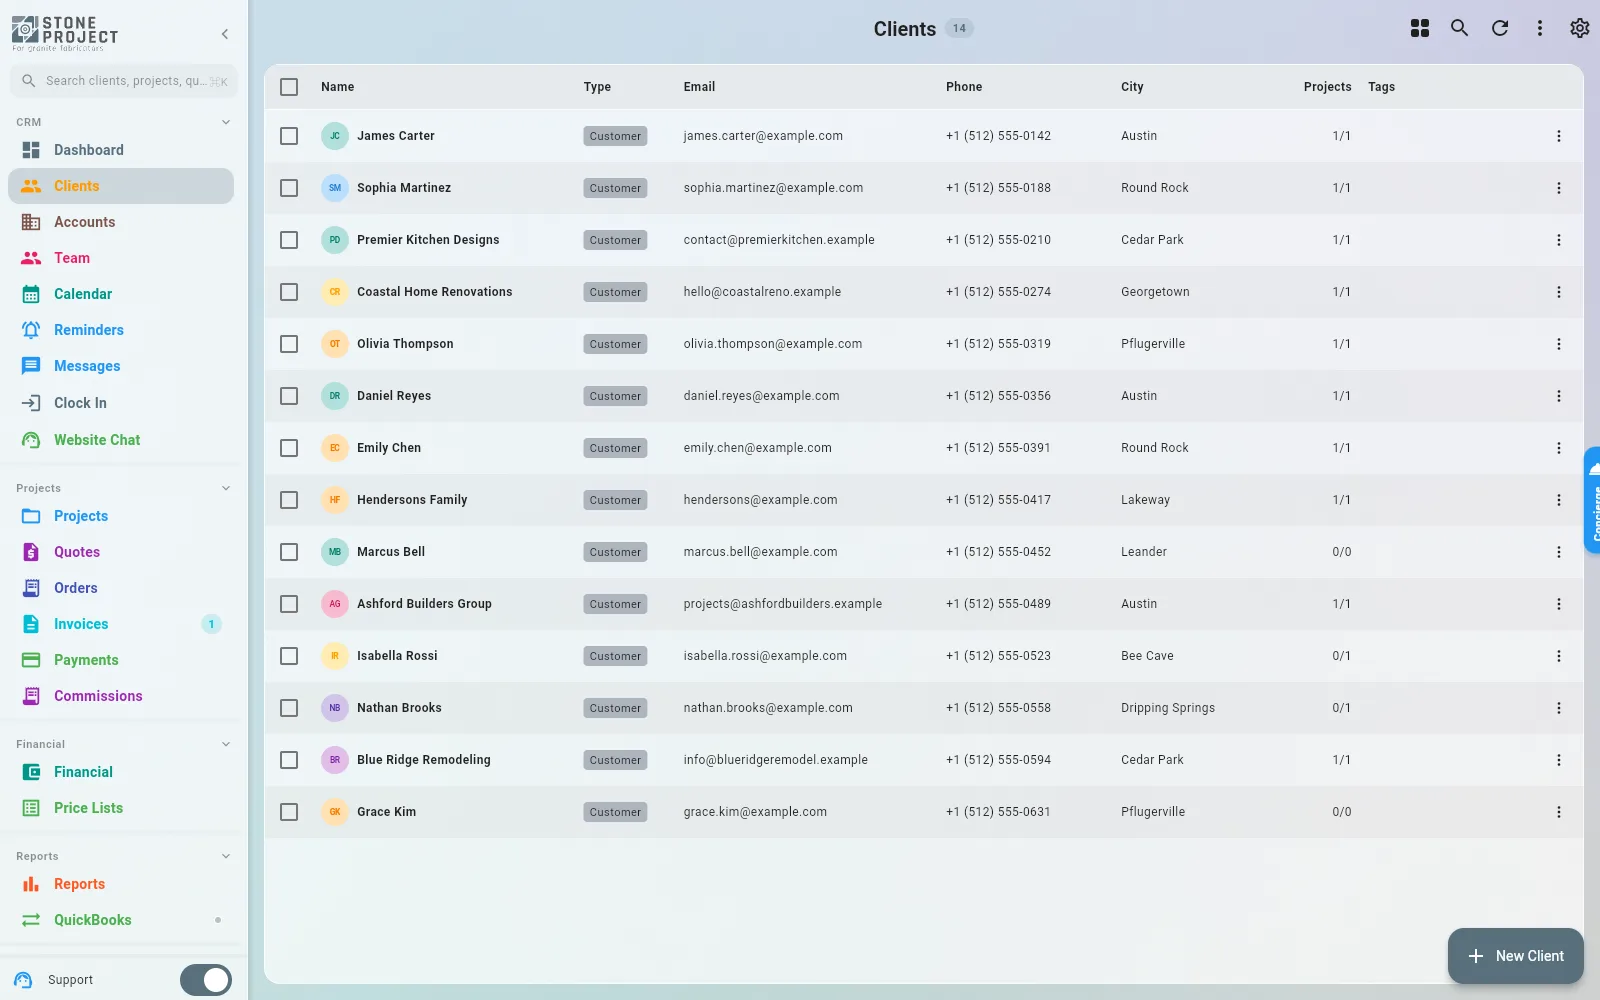
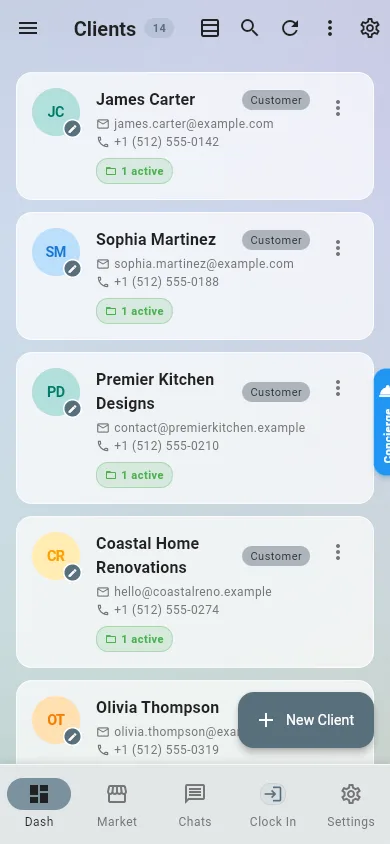
The same list on a phone:
Creating a New Client
- Go to More > Clients.
- Tap the + Add Client button.
- Fill in the client details:
| Field | Description |
|---|---|
| Name | Client's full name |
| Email address | |
| Phone | Phone number |
| Address | Service address |
| Company | Client's business name (if applicable) |
| Type | Dealer or Customer |
| Notes | Any additional notes or preferences |
| Tags | Categorize clients (e.g., "residential", "commercial") |
| Commission | Commission type and rate for this client (optional) |
- Tap Save.
Client Detail Page
Each client's page shows:
- Contact information
- List of associated projects
- Quotes sent to the client
- Invoices and payment history
- Reviews from the client
- Communication history
- Notes and tags
Editing & Deleting Clients
- Tap a client name to view their details.
- Tap Edit to update their information.
- Tap Delete to archive the client. Deleting is a recoverable archive, never a permanent erase.
What happens to the client's projects. If the client has projects, a dialog asks you to choose:
| Choice | Result |
|---|---|
| Archive the projects too (default) | Projects, contacts, and addresses are archived with the client. Restoring the client brings them all back. |
| Keep the projects and unlink them | Projects stay active but lose their client link. They do not re-attach if you restore the client. |
Invoices and payment history are never removed — they stay for your records.
To restore an archived client, open Clients, switch the filter to the Deleted view, and tap Restore.
Locking & Deactivating Clients
Deleting is not the only way to take a client out of circulation. Two lighter options sit in the ⋮ menu on the client's page.
Lock client stops new business with that client while leaving everything already on record untouched.
| Blocked while locked | Still works |
|---|---|
| Creating a new project for the client | Editing the client's details |
| Creating a quote on any of their projects | Existing projects, quotes, and orders |
| Turning an accepted quote into an order — manually or automatically | Invoices, payments, and the full history |
| Chat and quote requests they send through your website widgets | Messages, notes, and files already there |
When you lock, you can record a reason (for example, "Overdue account"). A red Client Locked banner then appears on the client's page showing that reason and who locked them, and a lock icon shows next to their name in the client list. Anyone trying to start new work for that client gets a clear message instead of a silent failure.
To unlock, open the client, tap the ⋮ menu, choose Unlock Client, and confirm. Locking and unlocking are available to anyone who can edit clients.
Deactivate client is for a contact who has left the company. It blocks nothing — the client simply drops out of the active list and out of every picker where you choose a client for new work. Their projects and history stay attached to the account. Use the Inactive or All filter on the client list to find them again, and Reactivate to bring them back.
A quick way to choose: lock when the relationship continues but you do not want new sales right now, deactivate when the person is gone, and delete only when the record should not exist at all.
6.3 Importing Clients
CSV Import
Import clients in bulk from a spreadsheet:
- Go to More > Clients > Import (or the import icon).
- Select CSV Import.
- Upload your CSV file.
- Map the CSV columns to Stone Project fields:
- Name, Email, Phone, Address, etc.
- Preview the import.
- Tap Import to create all clients.
CSV Format Requirements:
- UTF-8 encoding
- Comma-separated values
- First row should contain column headers
Contact Import
Import directly from your phone's contact list:
- Go to More > Clients > Import.
- Select Import from Contacts.
- Grant permission to access your contacts (if prompted).
- Select the contacts you want to import.
- Tap Import Selected.
6.4 Projects & Workflows
Creating a Project
- Go to More > Projects.
- Tap + New Project.
- Fill in the project details:
| Field | Description |
|---|---|
| Project Name | Descriptive name (e.g., "Kitchen Renovation - Smith") |
| Client | Select an existing client |
| Address | Project/service address |
| Status | Current workflow stage |
| Priority | Low, Medium, High |
| Due Date | Expected completion date |
| Description | Project details and scope |
| Bill To | Billing account (optional — for builders/umbrella entities) |
| Commission | Commission rate for this project (optional) |
- Tap Save.
Project Detail Page
Each project page includes:
- Project status and priority
- Associated client information
- Linked quotes and invoices
- Drawings created for the project
- Checklist of tasks to complete
- Files & documents uploaded to the project
- Activity timeline
Financial Visibility
Pro Feature
Financial visibility controls require a Pro subscription.
You can control which team members can see financial data (prices, totals, margins) in projects. This is useful when you want certain team members (e.g., installers) to see project details without seeing pricing information.
Financial visibility is controlled through Settings > Financial Visibility — see Settings > Financial Visibility for setup and Company Management > Permissions for role-based access.
6.5 Kanban Board
The Kanban board provides a visual workflow for managing projects:
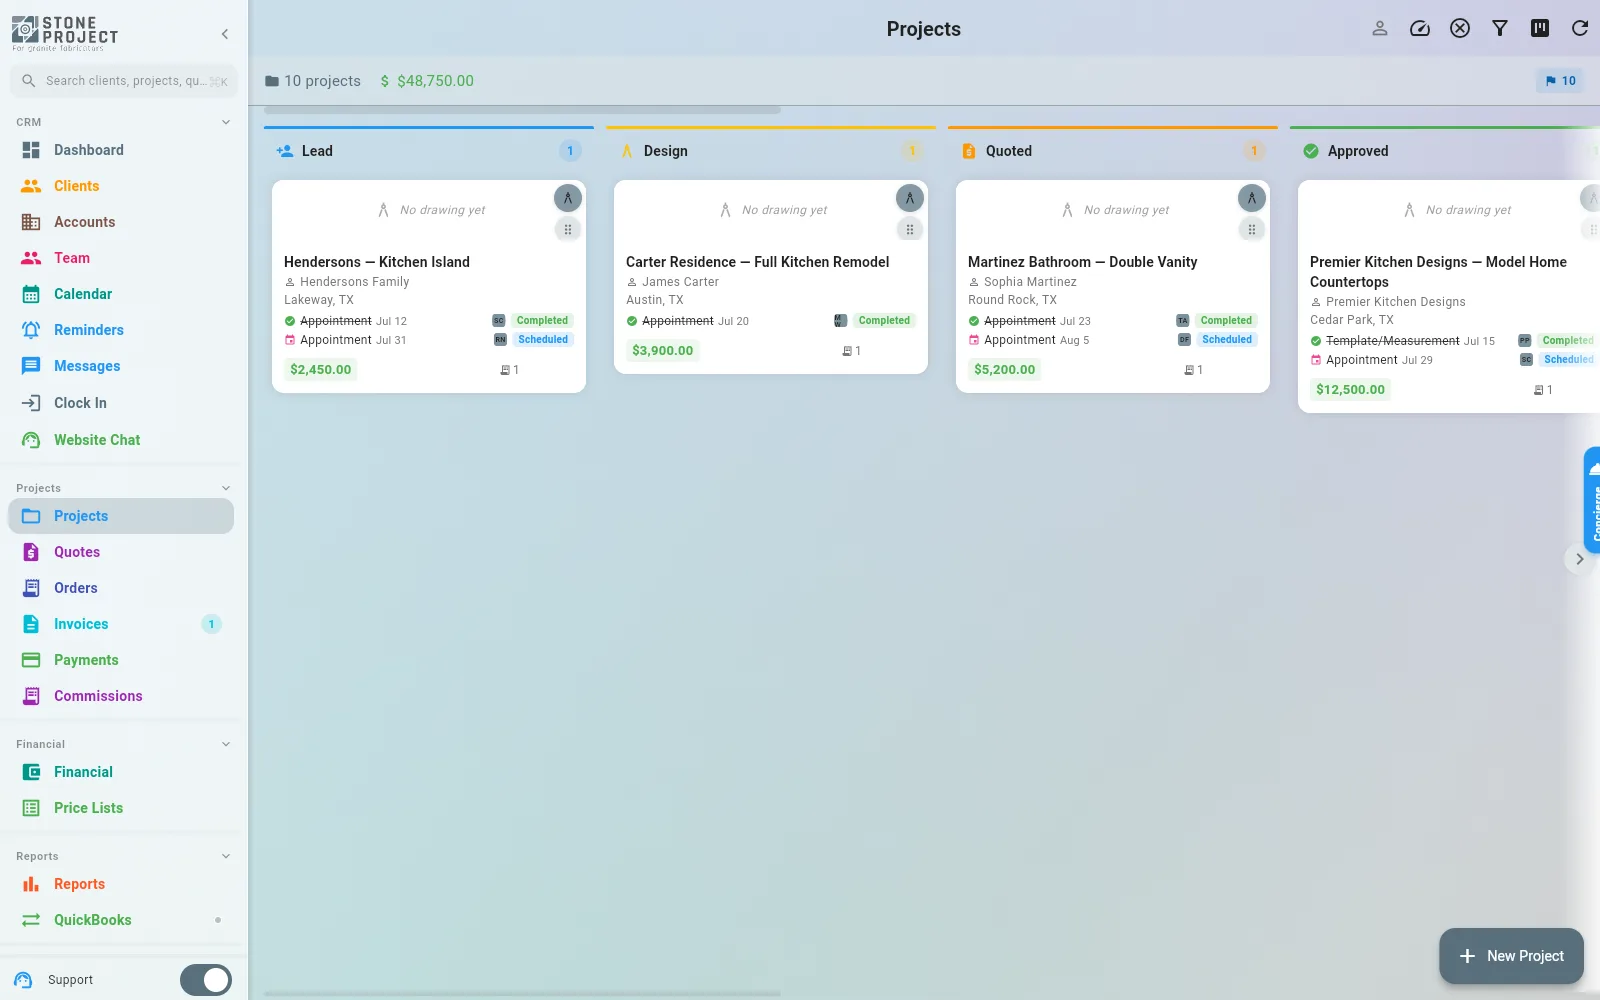
Default Workflow Stages
| Stage | Description |
|---|---|
| Lead | New inquiry or potential project |
| Design | Project is being designed (measurements, drawings) |
| Quoted | Quote has been sent to the client |
| Approved | Client approved the quote |
| Production | Work is in progress (fabrication) |
| Installation | On-site installation in progress |
| Completed | Project fully completed and closed |
| Cancelled | Project was cancelled |
| Lost | Project was lost to a competitor |
Using the Kanban Board
- Drag and drop project cards between columns to update their status.
- Tap a card to view the full project details.
- Each card shows an estimated value based on linked quotes, helping you visualize the revenue in each stage.
- Use the filter to show projects by client, priority, or date.
- On the Dashboard, each column is a preview. Tap View N more to expand that column in place and scroll the remaining cards; tap Show less to collapse it. View all in the Projects menu still opens the full board.
Automatic Stage Transitions
The Kanban board can automatically move projects between stages based on key events:
| Event | Transition |
|---|---|
| Quote created for project | Lead → Design |
| Quote sent to client | Design → Quoted |
| Quote accepted by client | Quoted → Approved |
| Fabrication activity started | Approved → Production |
| Installation scheduled | Production → Installation |
| Installation completed | Installation → Completed |
These automatic transitions can be customized or disabled in Settings > Workflow Designer.
Stage Automations (Activities, Notifications, Tasks)
Besides moving projects, each stage can run automations when a project lands on it — notify the team or the client, update a field, create a task, and create scheduled activities (Template, Fabrication, Install, and so on).
This is where activities normally come from: you do not need to create them by hand. A typical setup has the Approved stage create Template, Fabrication and Install, each with a default number of days from the approval date.
- Configure it in Settings > Workflow Designer > select the stage > Automations. For each activity you choose the type, how many days ahead it should fall, and who it is assigned to.
- When you move a card into that stage, a dialog previews everything that is about to run, including the activity list. You can change the dates and times there before confirming.
- Anything you remove from that list is not created. If you clear the activity list, the project moves to the new stage without any activity, and the project page will keep showing "No activities scheduled".
- Activities created this way appear on the project's Schedule card and on the Calendar. They are never deleted by approving a quote, sending a deposit request, or recording a payment.
If a project reached a stage without the activities you expected, add them from the project's Schedule card, or move the card out and back into the stage and confirm the list in the dialog.
Customizing Workflow Stages
You can customize the Kanban stages:
- Go to Settings > Workflow Designer.
- Add, remove, rename, or reorder stages.
- Set colors for each stage for visual clarity.
Splitting a Project into Phases
A kitchen and two bathrooms in the same job rarely move together: the kitchen gets approved, fabricated and paid while the bathrooms are still waiting on the client. Split into Phases lets each part of the job run — and bill — at its own speed.
Open the project and choose ⋮ > Split into Phases. The dialog gives you one row per phase: a name, plus checkboxes for the drawing areas that phase owns. An area belongs to exactly one phase, and anything you leave unchecked becomes an automatic phase named Remaining, so no area is ever left behind.
Splitting does not create two projects
Splitting does not create separate projects. The extra cards on the board are phases of the same project — the client, the address, the files, the drawings and the Project Details page all stay in one place. What each phase gets is its own Kanban card, so it can move on its own, and its own quotes, orders and invoices, so each part is priced and billed on its own line.
One live quote per project, phases included
Phases split the schedule, not the commercial seat: the project still keeps a single live quote. While the kitchen's quote is accepted, sending or accepting the bathroom's marks the kitchen's as Superseded — and that is not what you want once it is paid and in production. When a later part has to be approved and invoiced beside one that is already sold, open a separate job for it instead: see Quoting Only Part of a Job.
| Before the split | After the split |
|---|---|
| One card on the board | One card per phase, each in its own column |
| You drag the project card between stages | You drag the phase cards |
| A quote belongs to the project | A new quote asks which phase it covers |
- Phases start in the stage the job is already in. Splitting a project that already reached Approved leaves every phase in Approved — nothing is sent back to Lead.
- The project stage follows the least-advanced phase. With the kitchen in Production and a bathroom still in Design, the project reads as Design. That is also why the project card itself can no longer be dragged between columns: move the phase, and the project stage updates on its own.
- Requirements. The drawing must have more than one area, and a project can be split once. Removing every phase makes the option available again.
The Phases card on the project page lists each phase with its stage, how many areas it covers and its total. The ✕ next to a phase removes it: the areas go back to the project, and the quotes, orders and invoices that belonged to that phase are kept at project level. Deleting a phase never deletes money.
6.6 Creating Quotes
From a Project
- Open the project.
- Tap Create Quote.
- The Drawing Tool wizard opens (see Drawing Tool & Quotes).
- Design the countertop layout and complete all 6 steps.
- The generated quote is automatically linked to the project and client.
Standalone Quote
- Open the Drawing Tool from the bottom navigation.
- Complete the 6-step wizard.
- Optionally assign the quote to an existing client and project.
Quote Management
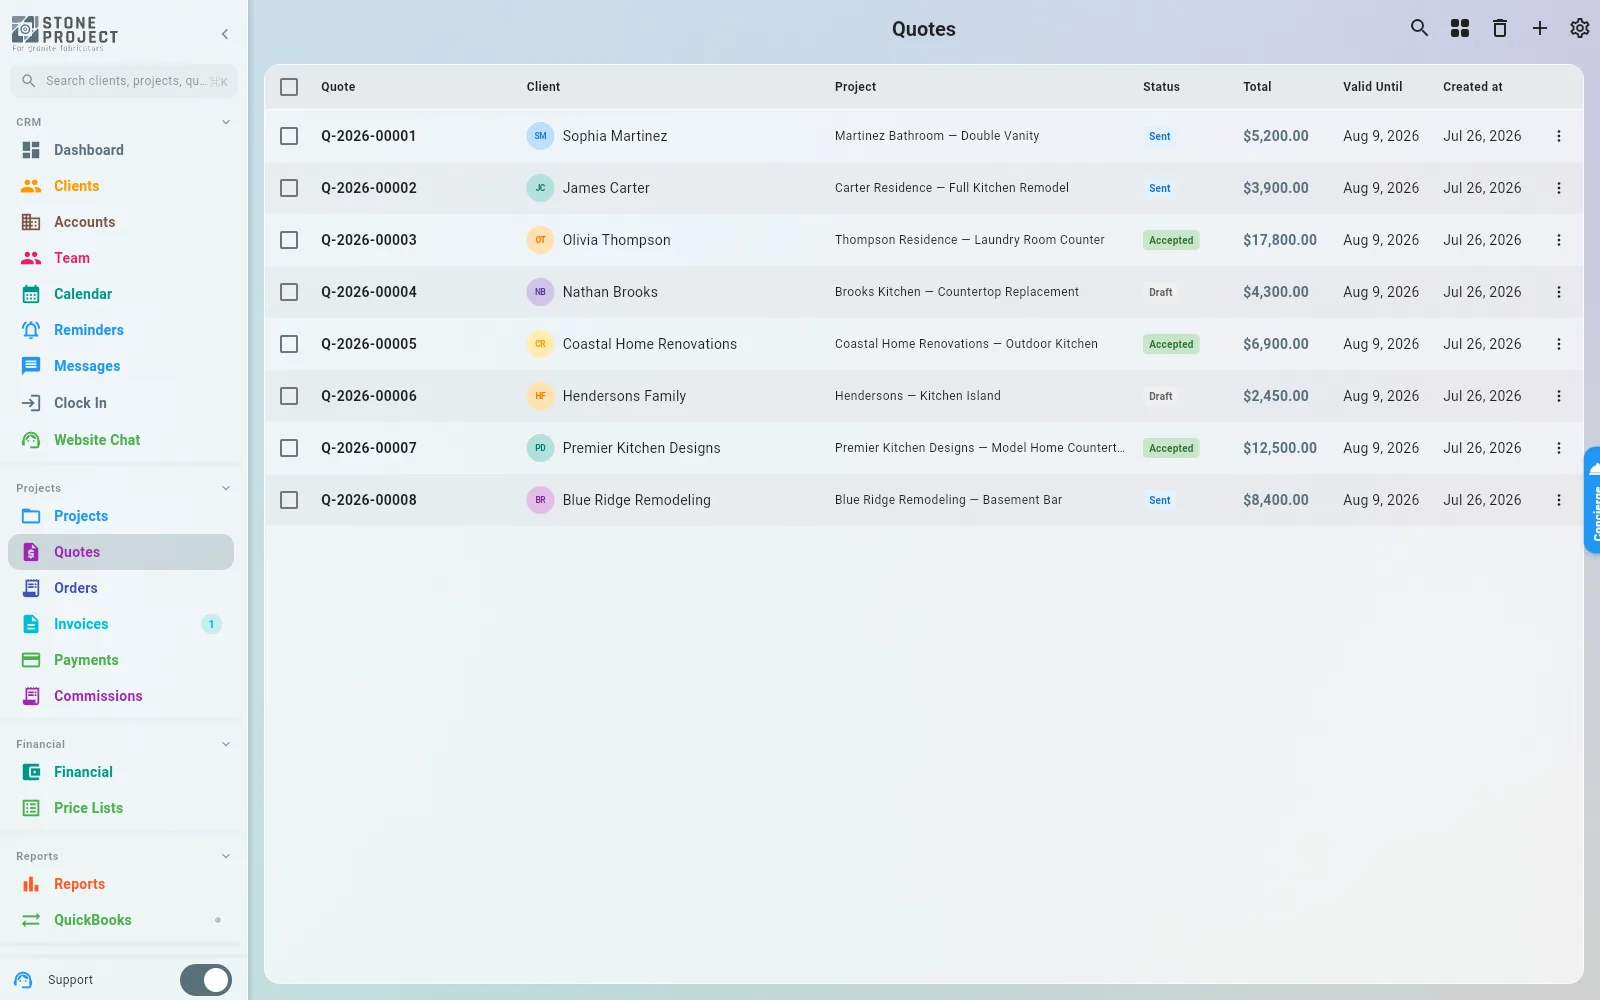
The same list on a phone, grouped by client and project:
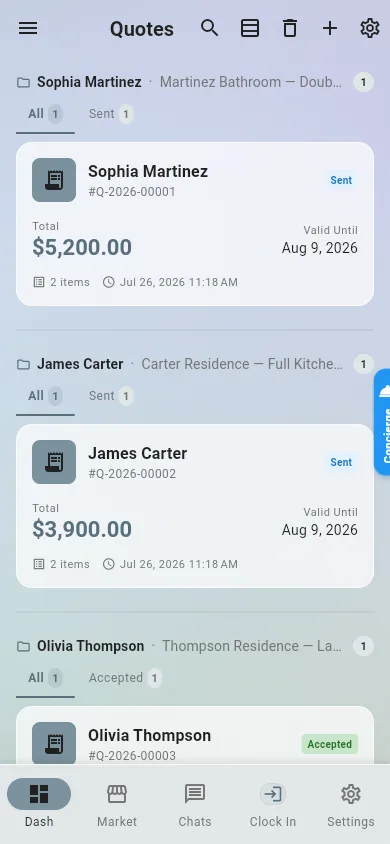
- View all quotes from More > Quotes.
- Filter by status: Draft, Sent, Approved, Rejected, Expired.
- Duplicate a quote to quickly create variations.
- Resend quotes via email or share the PDF.
Selling Without Installation
Some partners buy the tops and install them themselves, so the quote has to go out with no installation on it. There are two ways, and they answer different needs:
- This quote only: open the quote and look just above the totals for Include installation. Switch it off and every installation line leaves the quote at once, with the total dropping by the same amount. The switch only appears when the quote actually has installation lines on it.
- This customer, every time: build a second price list with installation priced at zero (or with the installation lines deactivated) and set it as the customer's price list — on the client, or as the Default Price List of their account. Then nobody has to remember the switch. See 22. Price Lists.
Emailing a Quote, and Where That Email Goes
Why is the email I sent not in my Sent folder?
Because it did not leave your mailbox. Send to Client sends the quote from Stone Project's own mail server, so your email provider has no copy of it in Sent — the record of it lives in the app, in the Email Log, and the client's reply comes back to a real inbox (see below).
What you get instead:
- The Email Log. Open the project and pick the Email Log tab (the project card that also holds Progress and Timeline); a client's page has the same tab. Each row is one email that left the system — who it went to, when, whether it was queued, sent or failed, and any attachments. The ⋮ menu on a row reopens the exact message that was sent, and resends it if needed.
- Replies come to a real inbox, not to the app. When the client hits Reply, the answer goes to the address set in Settings > Email Templates > Reply-To: Company Email (everything lands in the shop's mailbox), Sender's Email (each reply goes to whoever sent that quote) or Custom Email. So watch your normal inbox for the client's answer — the Email Log only keeps what went out.
- Cc yourself. Every send dialog has a Cc (optional) field under the client's address, plus a Send me a copy shortcut that drops your own address in — on Send to Client, on a resend, and on the plain email you write from the Email Log tab. Up to five addresses; the client's own address is ignored there, so nobody gets the same email twice. Whoever was copied is recorded on the Email Log entry.
The same three rules apply to the free-form email you compose from the Email Log tab, not only to quotes: it leaves from the server, it is logged, and the reply follows your Reply-To setting.
Automatic Follow-ups to the Client
Why did my client get a \"Friendly reminder\" about a quote I sent?
A sent quote with no answer gets automatic follow-up emails. By default there are three — 3, 7 and 14 days after you sent it — each worded a little differently (a first follow-up, a second one, a last check-in). The batch runs once a day, so a follow-up lands on the first daily run after that day has passed.
- See what went out. On the quote, under Sent to / Sent on, a line reads Client follow-ups: 2 of 3 sent · next on Sep 19. Each follow-up is also a row in the project's Email Log.
- Stop them for one quote. Tap Stop on that line. Nothing more goes out for that quote; Resume turns it back on.
- Change the schedule, or turn them off. Settings > Notifications > Company notifications > What the client gets has Quote follow-ups to clients: a switch, and the days after sending (tap to add or remove). Payment reminders to clients works the same way for unpaid invoices, counted from the due date (by default 1 day before, then 3 and 7 days after). Changing the days affects quotes and invoices already out, from the next daily run.
- They stop on their own when the quote is accepted or declined, replaced by a newer version, past its Valid until date, or when the job is marked lost or cancelled.
The Quotes & payments row in your personal notification settings is a different thing: it controls what you are told about quotes and payments, not what the client receives.
Alternative Versions (Duplicating a Drawing)
To offer the same client two options — a different layout, a different scope, a different set of areas — duplicate the drawing instead of opening a second project. On the project page, the drawing card carries New blank drawing, Duplicate and Edit. Duplicate makes an independent copy named "… (Copy)" that you can edit freely, leaving the original untouched.
Same layout, different stone? Don't duplicate.
For "granite in one, quartz in the other" on the same layout, add Color Options to the area and export one PDF per option — no second drawing, no second quote to keep in sync. See Using Color Options for Quote Comparisons.
Each version produces its own quote, so a project with two drawings normally shows two quotes. That is expected, and it does not bill the client twice:
- Only one quote counts per project. When you send or accept one, every other quote of that project that had already been sent or accepted is marked Superseded, and its follow-up reminders are cancelled. Quotes still in Draft are left alone.
- Replacing an accepted quote asks first. The app names the accepted quote and its total before it is superseded, and warns about any deposit already paid against it, so the payment is never left stranded.
- Superseded is not the end. If the client goes back to the earlier option, send or accept that quote again and it takes the live seat back.
Use the ⋮ menu on a drawing card for Set as primary (the ★ version, the one used for previews and for the PDF), Rename, Copy to another project, Export or Delete.
Measured onto the wrong client?
⋮ > Copy to another project sends the drawing — areas, materials and pricing — to any other project of your company: search it by name, code or client and confirm. The original stays where it is, so delete it afterwards if it was a mistake.
Duplicating a drawing is not duplicating the project
The Duplicate in the project's own ⋮ menu copies the whole project, which is what you want for a repeat job at another address. To compare materials or layouts inside the same job, duplicate the drawing.
Quoting Only Part of a Job
A job often sells in pieces: the kitchen closes first, and the backsplashes, the vanity or the laundry are decided weeks later. You never have to redraw or move anything for that — the areas you measured are already on the drawing, and both the estimate and the quote can be narrowed to the ones you choose.
- To send the price of a few areas only. Open the drawing and choose Export Quote. The export dialog has an Areas in the PDF section with one checkbox per area: leave only what you are selling now, and the drawing, the line items and the total on the PDF cover just those areas. Nothing is created in the system, so an accepted quote already sitting on the job is not touched.
- To create a quote for a few areas only. Inside the drawing, Create Quote opens Select Areas for Quote whenever there is more than one area, and flags the ones another quote already covers — so you pick only what is left.
Selling the rest later is a second job, not a second quote
A project keeps one live quote: send or accept a second one and the first is marked Superseded — which is exactly what you do not want when the first is already paid and in production. So when the remaining areas become a new sale, with its own approval and its own invoice, create a new project for the same client and use ⋮ > Copy to another project on the drawing: the areas, materials and pricing go with it and the original stays put. In the copy, delete the areas already sold, quote the rest, and each job runs and bills on its own.
Quote QR Code Sharing
Share a quote instantly using a QR code:
- Open the quote you want to share.
- Tap the QR Code icon.
- A unique QR code is generated that links directly to the quote.
- The client scans the code and can view, approve, or reject the quote — no account required.
This is especially useful during in-person client meetings or at the job site.
6.7 Project Files & Documents
Organize all project-related files in a structured folder system:
Uploading Files
- Open a project.
- Scroll to the Files section.
- Tap Upload to add files (photos, PDFs, sketches, contracts, etc.).
- Files are stored securely in the cloud and accessible to your team.
Downloading Files
To save a file from a job to your computer or phone (a template, a DXF, a PDF, a photo):
- Open the project and scroll to the Files section.
- On the file's row, tap the ⋮ menu (or right-click / long-press the file).
- Choose Download. The file is saved with its original name.
Tapping the file itself only opens it for viewing — for a CAD file or anything the browser cannot display, use Download. The file viewer also has a download icon at the top. Files are downloaded one at a time; there is no "download all" for a job.
Folder Organization
Organize files into folders for easy access:
- In the project's Files section, tap New Folder.
- Name the folder (e.g., "Client Drawings", "Contracts", "Site Photos").
- Drag files into folders or use the Move option.
- Create nested folders for complex projects.
Sharing Files
- Files uploaded to a project can be shared with clients through the Client Portal (see Integrations > Client Portal).
- Team members with project access can view and download all files.
6.8 Project Checklists
Keep track of tasks within a project:
- Open a project.
- Scroll to the Checklist section.
- Tap + Add Task to add items.
- Check off tasks as they are completed.
Default Checklist Templates
You can create reusable checklist templates:
- Go to Settings > Project Checklists.
- Create a template with common tasks (e.g., "Template Taken", "Material Ordered", "Edges Finished", "QC Passed").
- Apply templates to new projects for consistent workflows.
Automatic Checklist Updates
Some checklist items are updated automatically based on events:
| Event | Checklist Item Updated |
|---|---|
| Invoice marked as Paid | "Deposit Received" checked |
| Tearout activity completed | "Tearout Completed" checked |
| Plumbing disconnect scheduled | "Plumbing Disconnect" checked |