20. Financial: AR, AP & Bank Reconciliation (Pro)
One ledger for every dollar coming in and going out — receivables, payables, and the bank reconciliation that proves the two agree with your statement.
Note: The Financial module requires an active Pro subscription.
20.1 What the Financial Module Tracks
The Financial module is a single ledger with two kinds of entries:
| Type | Meaning | Examples |
|---|---|---|
| Receivable | Money coming in | An invoice you sent, a deposit you are waiting on |
| Payable | Money going out | A vendor bill, a slab purchase, rent, a subcontractor |
Every entry carries the same core information — a description, an amount, a due date, and a status — plus optional links to a client, a supplier, a project, and a category. Because receivables and payables live side by side, one screen answers the question "what do I owe and what am I owed, and when."
Open it from More > Financial.
Who can open it
Viewing the module requires the financial.view_dashboard permission, and creating entries requires payments.create. A team member without the view permission sees an access notice instead of the ledger.
20.2 Reading the Dashboard
The tiles across the top of the Financial screen summarize the whole company:
| Tile | What it shows |
|---|---|
| Cash in bank | Appears once a bank is connected (see 20.13). The balance your connected checking and savings accounts reported at their last update; what the connected credit cards owe shows underneath. Accounts typed in by hand are not included |
| Payable | Everything still open on the payable side, with the number of overdue payables underneath |
| Receivable | Everything still open on the receivable side, with the number of overdue receivables underneath |
| Paid this month | Net cash for the current calendar month — receivables collected minus payables paid |
| Overdue total | Combined amount past due, payables plus receivables. Red when there is anything overdue |
A few things worth knowing about these numbers:
- They cover the whole company, not the filtered list below them. Changing a filter does not change the tiles.
- "Still open" means Pending, Partial and Overdue — a partially paid entry still counts at its full amount.
- Cancelled transactions are excluded everywhere.
- Installments are counted once — the parent entry is what shows, not each individual installment.
- Paid this month is a net figure, so a heavy vendor-payment month can push it negative even when collections were healthy.
- The Overdue flag is applied by a daily process that runs early each morning, so an entry that came due today is normally counted as overdue from tomorrow.
Amounts showing as ***
If figures appear as *** or ••••, financial data is hidden for your user. See 12.11 Financial Visibility.
20.3 Finding a Transaction
- Go to More > Financial.
- Tap the search icon to open the search and filter panel.
- Type to search by description or reference number, and combine it with the filter chips.
| Filter | Options |
|---|---|
| Status | Pending, Overdue, Paid, Cancelled |
| Type | Payable, Receivable |
| Category | Any category you have created |
| Client | Pick a client from the dropdown at the bottom of the panel |
| Date range | Filters by due date, not by the date the entry was created |
| Sort by | Due date, Amount, or Created date — ascending or descending |
Tap Clear All to reset every filter at once.
List view and table view
Use the grid / table icon in the header to switch between:
- Cards — one card per transaction, best on a phone.
- Table — a dense spreadsheet-style view with columns for type, description, client, category, status, amount and due date. Only the table view supports multi-select.
Acting on several transactions at once
- Switch to table view.
- Tick the checkbox on each row you want (or the header checkbox to select the page).
- Tap Bulk Actions at the bottom and choose Cancel or Delete.
- A progress dialog reports how many succeeded and how many failed.
20.4 Creating a Transaction Manually
Use this for anything that does not already flow in from an invoice or a bill — rent, insurance, a cash sale, a one-off payout.
- Go to More > Financial.
- Tap + (New Transaction).
- Choose Payable or Receivable at the top. This cannot be changed later.
- Fill in the form:
| Field | Description |
|---|---|
| Description | Required. What the money is for — this is the line you will scan for later |
| Amount | Required. Must be greater than zero |
| Category | Optional. Only categories matching the type (or marked "Both") are offered |
| Project | Optional. Ties the entry to a job so it shows up in that project's context |
| Client | Receivables only |
| Supplier | Payables only |
| Due date | Required. Drives the overdue calculation and the default sort order |
| Issue date | Optional. Defaults to today |
| Payment method | Optional. Free-form or picked from your configured methods |
| Reference number | Optional. Check number, vendor invoice number, confirmation code — it is searchable |
| Notes | Optional. Internal only |
- Tap Save.
Splitting into installments
On a new transaction only, open the Installments card and pick a number of installments (2 or more). The app splits the total evenly, dates each installment 30 days after the previous one, and shows an editable row per installment so you can adjust any amount or date. The running total is displayed as paid so far / total so you can see immediately if the split no longer adds up.
The parent entry keeps the full amount and each installment becomes its own transaction, individually payable. Opening the parent shows the installment list with each one's status.
Repeating transactions
Turn on Recurring Transaction and choose how often it repeats — Weekly, Biweekly, Monthly or Quarterly — plus an optional end date. Leave the end date blank to repeat indefinitely. The next occurrence is generated automatically as each due date passes.
Installments and recurrence are set at creation time
The installment split is only offered while creating. Editing an existing transaction cannot break it into installments after the fact.
20.5 Transactions the App Creates for You
Most of the ledger fills itself in. You do not need to re-enter any of this:
| What you did | What appears in Financial |
|---|---|
| Created an invoice | A receivable for the invoice total, due on the invoice due date |
| Created a payment link for a project | A receivable for the auto-generated invoice |
| Set up a payment plan on an invoice | A receivable parent plus one entry per installment |
| Saved a vendor bill | A payable for the bill total, due on the bill due date |
| Generated a purchase order | A payable for the PO total, due on the expected delivery date (or 30 days) |
| Added inventory with a purchase price | A payable for the purchase, optionally split into installments |
These entries stay linked to the document that created them. Open the transaction and the Related card links straight back to the invoice, the project, the client, the supplier, or the inventory piece.
20.6 Recording a Payment
Open any transaction to act on it.
Paid in full
- Tap Mark as Paid.
- Optionally pick a payment method and enter a reference number.
- Tap Confirm.
The status becomes Paid and the paid date is stamped. If the transaction came from an invoice, the invoice is also credited with a matching payment and moves to Paid — you do not record the payment twice.
Partial payment
- Tap Partial Payment.
- Enter the amount received, plus an optional method and reference.
- Tap Confirm.
The status becomes Partial and a progress bar shows paid versus Balance Due. Repeat as more money arrives; the last payment that closes the balance flips the status to Paid.
Cancel or delete
- Cancel keeps the record but removes it from every total and from the overdue count. Use it for a bill that was voided.
- Delete removes it from the ledger. Use it for something entered in error.
Statuses
| Status | Meaning |
|---|---|
| Pending | Not yet due, nothing paid |
| Partial | Some money received or paid, a balance remains |
| Paid | Settled in full |
| Overdue | Past the due date and still not settled |
| Cancelled | Voided — excluded from all dashboard totals |
A paid transaction can no longer be edited
Once a transaction is marked Paid, the edit form refuses to save changes. If the amount was wrong, cancel the entry and create a corrected one.
20.7 Categories
Categories are how the ledger becomes a report — "materials", "rent", "subcontractors", "equipment".
- Open any transaction form and tap the gear next to the Category dropdown.
- Type a name, choose whether it applies to Payable, Receivable or Both, and tap +.
- Existing categories can be renamed, recolored, or deleted from the same sheet.
Categories supplied with the system can be edited but not deleted.
20.8 Bank Accounts
Register each account you actually move money through — a checking account, a savings account, a company credit card.
| Field | Description |
|---|---|
| Account Name | Required. Your own label, e.g. "Operating — Chase" |
| Bank Name | Optional. The institution |
| Type | Checking, Savings, or Credit Card |
| Last 4 digits | Optional. Shown next to the name as (••1234) so accounts are easy to tell apart |
| Current Balance | The balance the app should assume today. Negative values are allowed |
Each account card shows its Current Balance and when it was Last Reconciled (or Never reconciled), plus a Bank Reconciliation button.
Reaching the Bank Accounts screen
Bank Accounts does not have its own entry in the main menu yet. In the web app, open it directly at the address /financial/bank-accounts.
20.9 Running a Bank Reconciliation
Reconciling means proving that the transactions you recorded match the ones your bank actually processed. You do it once per statement.
- Open Bank Accounts and tap Bank Reconciliation on the account.
- Tap Start Reconciliation.
- Fill in the statement details:
| Field | Description |
|---|---|
| Statement Date | The closing date printed on the statement |
| Statement Balance | The ending balance on the statement — the number you are proving out to |
| Opening Balance | Pre-filled from the last completed reconciliation (or the account's current balance the first time round) |
- Tap Start Reconciliation. The workspace opens with every paid transaction attached to this account, dated on or before the statement date.
- Tick each transaction that also appears on your statement. Clear All and Unclear All handle a whole page at once.
- Watch the summary bar at the top as you go:
| Number | What it means |
|---|---|
| Statement Balance | What you entered — the target |
| Cleared Balance | Opening balance, plus every cleared receivable, minus every cleared payable |
| Cleared | How many transactions you have ticked |
| Difference | Statement balance minus cleared balance |
- When Difference reaches zero, the bar turns green and Complete Reconciliation becomes available. Tap it.
Completing the reconciliation locks the session, stamps who finished it and when, and sets the account's current balance to the statement balance.
What "cleared" means
Ticking a transaction says: this one has actually hit the bank. A transaction you recorded on the 30th that the bank did not process until the 2nd of the following month stays unticked this round and gets cleared next round — that is exactly the gap a reconciliation is designed to expose.
When the difference will not go to zero
The difference has to be zero (within one cent) before the app will let you complete. If it will not close, work through these in order:
- A transaction is on the statement but not in the app. Create it, mark it paid, then tick it.
- A transaction is in the app but not on the statement. Leave it unticked — it will clear next month.
- An amount is wrong. Compare the ticked amounts against the statement line by line. If one is wrong, cancel it and enter a corrected transaction.
- The opening balance is wrong. Cancel the session and start again with the closing balance from the previous statement.
Tap Cancel at any time to abandon a session; nothing you ticked is kept as reconciled.
One open reconciliation per account
An account can only have one reconciliation in progress. Finish it or cancel it before starting the next statement — reopening the screen takes you straight back into the open session.
An empty transaction list
The workspace only lists transactions that are marked paid and associated with this specific bank account. If the list comes up empty, no paid transaction is associated with the account yet.
Reconciliation history
The account's reconciliation screen lists past sessions newest first, each showing the statement date, the statement balance, and whether it was Completed, In Progress, or Cancelled.
20.10 Financial, Invoices and Vendor Bills — Same Money, Different View
These three screens are not three sets of books. They are three ways of looking at the same money:
| Screen | What it is for |
|---|---|
| Invoices | The document you send a client — line items, tax, terms, PDF, payment link |
| Vendor Bills | The document a supplier sent you — bill number, line items, approval |
| Financial | The ledger — the cash consequence of both, in one list, sorted by when it is due |
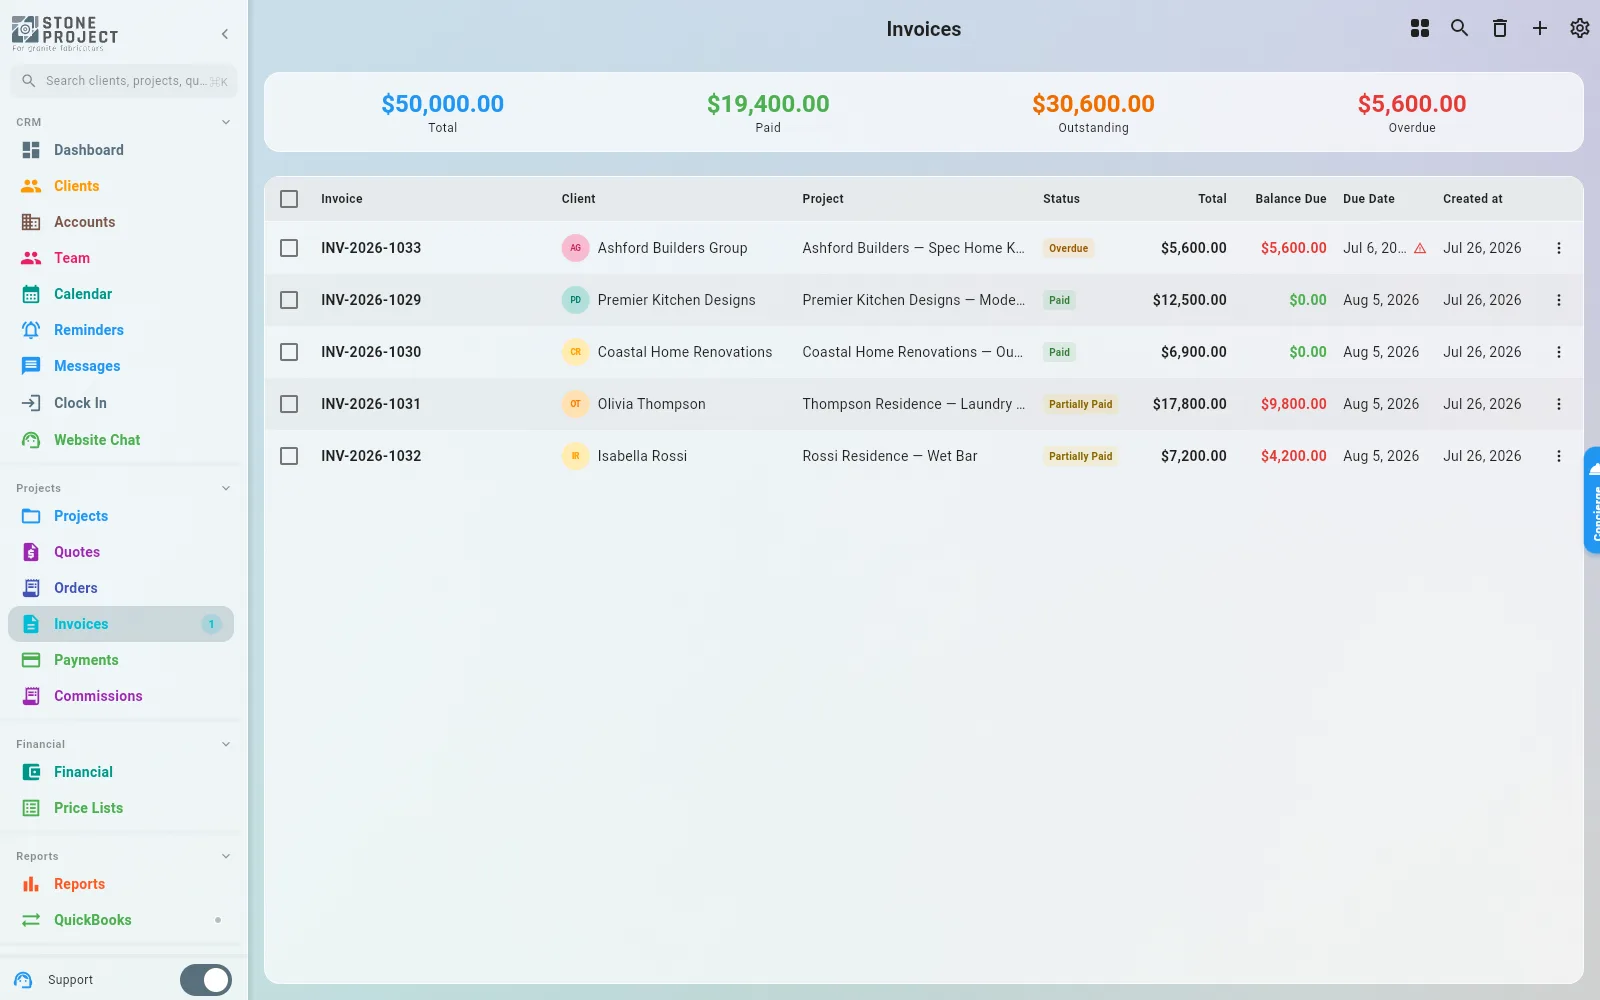
Create an invoice and a receivable appears in Financial automatically. Save a vendor bill and a payable appears. Marking the Financial entry paid feeds back to the invoice, so the two never drift apart.
Use Invoices (7.1) and Vendor Bills (7.7) when you care about the paperwork. Use Financial when you care about the cash — what is overdue, what lands next week, what a given project actually cost.
20.11 "Financial" the Module vs "Financial Reports" the Report
Two different things share almost the same name. They answer different questions:
| Financial (this chapter) | Financial Reports (13.4) | |
|---|---|---|
| Where | More > Financial | More > Analytics > Financial |
| What it is | A ledger of individual transactions | Aggregated business metrics |
| Answers | "Who owes me? What do I owe? What is overdue?" | "What is my margin? What does a square foot cost me? How is revenue trending?" |
| Granularity | One row per transaction, editable | Charts and totals, read-only |
| Source | Receivables and payables you and the app record | Quotes, projects, materials and invoices |
Rule of thumb: if you want to act on a specific amount, you want the Financial module. If you want to understand a period, you want Financial Reports.
20.12 Getting the Numbers to Your Accountant
QuickBooks
If QuickBooks is connected, a payable that has a supplier assigned can be pushed across as a bill:
- Open the payable.
- Tap Sync to QuickBooks (in the header menu, or the sync row on the transaction).
- Confirm.
The transaction then shows a sync badge with its status and the last sync time. Syncing again updates the QuickBooks record rather than creating a duplicate.
Requirements and limits:
- The transaction must be a payable and must have a supplier.
- Receivables reach QuickBooks through their invoice, not through the Financial entry — see 7.5 QuickBooks Integration.
Figures for a period
The Financial ledger is a working screen — it has no spreadsheet export of its own. For period figures to hand to an accountant:
- More > Reports exports revenue for a chosen period as PDF or Excel/CSV, broken down by salesperson and by order status.
- More > Analytics > Financial shows cost per square foot, profit margins and cost versus revenue for a period on screen.
For the ledger itself, filter the list by date range and status and read it directly, or rely on the QuickBooks sync above to keep the books in step.
20.13 Connected Banks and the Bank Statement
Connect your business bank once and every deposit and payment arrives on its own — no statement files to download. Open Financial > Bank Statement in the menu.
Connecting a bank
- Tap Connect bank.
- A secure Plaid page opens. Find your bank, sign in with your online banking login and pick the accounts to share (checking, savings and business credit cards).
- When you finish, you come back to the Bank Statement screen and the bank appears under Connected banks. On the phone and Windows apps, return to Stone Project and tap Done.
The first import brings up to two years of history. It can take a few minutes for older months to show up; new transactions keep arriving on their own after that.
Who can do what:
| To… | The user needs |
|---|---|
| See the bank statement | View financial dashboard |
| Connect, update or disconnect a bank | Create payments |
If Connect bank is missing, your role does not include Create payments — ask the account owner or an admin.
How many banks your plan includes
Each bank login counts once, no matter how many accounts it has. Solo includes 1, Team 2, Business 3 and Enterprise 5; a trial includes 1. The screen shows how many you are using. When you reach the limit, remove a bank you no longer need, or contact support.
The monthly statement
Pick the month with the arrows. The three totals are Money in, Money out and Net for the month, followed by every transaction with its date and account. When you have more than one account, a filter lets you look at one at a time. Transactions from statement files imported in Accounting show here too.
Each connected account also shows the balance the bank last reported.
When a bank asks you to sign in again
Banks periodically require a fresh login. The bank then shows a lock icon and a Sign in again button; tap it, sign in on the Plaid page, and transactions resume from where they stopped — nothing is lost.
Disconnecting a bank
Tap the unlink icon next to the bank and confirm. New transactions stop arriving; everything already imported stays in your statement and your books.
Categorizing bank transactions
Booking bank transactions into your chart of accounts happens in Accounting > Statement. When you open a line, the most likely account is already at the top, marked Suggested — the account you chose last time for the same merchant, or the one that matches the kind of purchase (fuel, rent, hardware store, bank fee). After you post a line, if more lines from the same merchant are waiting, a message offers Book the same to post them all to that account in one tap. A refund from that merchant (money coming in) is never included.
Related: Billing & Invoicing · Analytics & Reports · Integrations · Settings