4. Drawing Tool & Quotes (Pro)
Design countertops, calculate material costs, and generate professional PDF quotes — all from your phone or desktop.
Pro Feature
The Drawing Tool and Quote generation require an active Pro subscription.
Prefer to watch it?
Drawing and pricing a countertop, start to finish is a 14-minute video of this whole chapter, from the empty canvas to the priced quote. The slab layout is at 8:36.
4.1 Overview
The Drawing Tool is a 6-step wizard that guides you through the complete process of designing a countertop layout and generating a detailed price quote. It includes:
- An interactive canvas for drawing countertop shapes
- Pre-defined shape templates (Quick Draw)
- Shape Library — Save and reuse custom shapes across projects
- Edge profile and backsplash configuration
- Sink and cooktop cutout placement
- Seam placement and slab layout optimization
- Material and color selection with real pricing
- DXF import/export — Integrate with AutoCAD, SolidWorks, and CNC machines
- AI Drawing Assistant — Generate drawings from photos
- Drawing export in PNG, PDF, and DXF formats
- Revision history — Track and restore previous versions
- PDF quote generation for clients
To start a new quote:
- Tap the Drawing Tool icon in the bottom navigation, or
- From the Dashboard, tap New Quote, or
- From a Project (Pro), tap Create Quote.
4.2 Step 1: Counter Dimensions
Goal: Draw the countertop shapes and define their dimensions.
Adding Shapes
Use Quick Draw to add pre-defined shapes to the canvas:
| Shape | Description |
|---|---|
| Rectangle | Standard rectangular counter section |
| L-Shape | Two-sided counter forming an L |
| U-Shape | Three-sided counter forming a U |
| Polygon | Custom multi-sided shape |
| Ellipse | Rounded/oval counter section |
| Freeform | Draw any custom shape freely |
To add a shape:
- Tap Quick Draw in the toolbar.
- Select the desired shape.
- The shape appears on the canvas.
- Adjust dimensions by:
- Tapping on a dimension label and entering a new value
- Dragging the resize handles on the shape
Working with Shapes
| Action | How To |
|---|---|
| Select | Tap a shape on the canvas |
| Move | Drag a selected shape |
| Resize | Drag the corner/edge handles |
| Rotate Left | Context menu > Rotate Counter Left (90 degrees) |
| Rotate Right | Context menu > Rotate Counter Right (90 degrees) |
| Mirror (flip) | Context menu > Flip Horizontal or Flip Vertical: turns the piece into its mirror image, e.g. a left-hand L into a right-hand one, without redrawing it |
| Duplicate | Context menu > Duplicate Counter |
| Delete | Context menu > Delete Counter |
Adding Text Labels
Add text annotations to identify areas on the layout:
- Tap the Text tool in the toolbar.
- Tap on the canvas where you want the label.
- Type your label (e.g., "Kitchen Island", "Guest Bath").
Dimension Format
- Dimensions are displayed on each edge (e.g., 126", 38" x 23").
- Fractional dimensions are supported (e.g., 25 1/2", 16 1/4").
- Tap any dimension to edit it manually.
4.3 Step 2: Curves & Bumpouts
Goal: Add curves, radii, and bump-out extensions to your countertop shapes.
Curves
- Select an edge or corner on your shape.
- Choose a curve type (radius, arc).
- Set the curve radius value.
- Preview the curve in real-time on the canvas.
Bumpouts
- Add extended sections that protrude from the main shape.
- Useful for eating bars, extended work areas, and peninsula additions.
- Set the depth and width of the bumpout.
4.4 Step 3: Splash & Edge
Goal: Configure backsplash and edge finish options.
Backsplash
- Select which edges should have a backsplash.
- Set the backsplash height (typically 4" or 6").
- Choose between full-height splash or standard.
Edge Finish
- Select the edge profile for each visible edge.
- Common edge profiles include:
- Straight/Eased
- Beveled
- Bullnose (Half, Demi, and Full)
- Ogee
- Dupont
- Cove
- Waterfall
- Laminated
- Mitered
Each edge can have a different profile. The selected edge profile affects pricing in the final quote.
4.5 Step 4: Sink & Cooktop Cutouts
Goal: Place sinks, cooktops, and custom cutouts on the countertop.
Adding Cutouts
- Tap the cutout tool in the toolbar.
- Choose the type:
- Sink cutout — Standard sink shapes and sizes
- Cooktop cutout — Standard cooktop dimensions
- Faucet cutout — Faucet hole placement
- Outlet cutout — Electrical outlet openings
- Fireplace opening — Fireplace surround openings
- Niche — Wall niche cutouts
- Vent — Ventilation openings
- Custom cutout — Define your own shape and dimensions
- Position the cutout on the canvas by dragging it to the desired location. While it is selected, the drawing shows the distance from the side of the piece (left, or right if you chose it) and from the back edge to the cutout's center.
- Adjust dimensions as needed.
To place a sink by its center measurement instead of dragging, tap the cutout, choose Properties, and type Center from left and Center from back. Save moves the cutout so its center sits exactly there.
Measure from the fixed wall. If the wall is on the right side of the top and the left side is open, pick Right under Measure center from: the field becomes Center from right, and the drawing and the print show the distance from the right edge. The open side is an overhang the customer can still change, so it is not a reliable reference.
Cutout Options
| Option | Description |
|---|---|
| Shape | Rectangular, oval, or custom |
| Dimensions | Width x length of the cutout |
| Center from left | Distance from the left side of the piece to the cutout's center (or Center from right, when Measure center from is set to Right) |
| Center from back | Distance from the back edge (the wall) to the cutout's center |
| Mark center on drawing | Prints both center distances on the quote and shop drawing, and draws the centerline. Typing a center — or picking the side you measure it from — turns this on when you save, so a center you typed reaches the shop. Set it to None if you do not want those numbers on the sheet. |
| Corner Radius | Round the corners of rectangular cutouts |
4.6 Step 5: Color & Edge Profile
Goal: Select the stone material, color, and finalize the edge profile for pricing.
Material Selection
- Browse available stone materials.
- Filter by type (Marble, Granite, Quartz, etc.).
- Select a specific color/pattern.
- The canvas updates to show a texture preview of the selected material.
The Color You Want Exists, but Not in That Finish
The finish list on a color only offers what the catalog has for that color. If your Jet Mist is registered as polished only, Leathered will not be in the list, and the pencil next to the material will not add it either — that pencil is Edit price, and it only changes the price for this quote.
Two ways out, depending on whether this is a one-off or a color you sell often:
- Just this quote: pick Other Color (one time use) at the bottom of the color picker. Type the name the customer should read (
Jet Mist Leathered), choose Leathered in the Finish field, and enter the price. The quote and the PDF carry the name and finish you typed. - Every quote from now on: tick save to the brand library in that same dialog, and the color is added to the brand with the finish you chose — so it shows up next to the polished one in the picker from then on. You can also add it directly in More > Financial > Price Lists > Materials.
Several Material Options on the Same Area
An area can carry more than one material option, so the customer chooses between stones on a single quote. Add them in the Material & Color step, and use the pencil beside each option — it opens Edit price — to set what that option costs on this quote.
All my options are showing the same total
An option whose color carries no price in the catalog is priced at zero, so every option missing a price lands on the very same total: the one made of everything except the stone. Put a price on each one — the pencil beside the option — and the totals separate. Pricing the color in More > Financial > Price Lists fixes it for every future quote instead of one at a time.
For the comparison grid, the comparison table in the PDF and how to export one proposal per stone, see 16.3 Using Color Options for Quote Comparisons.
Edge Profile Review
- Review and confirm the edge profile for all edges.
- Pricing is calculated based on the selected material and edge profile combination.
Price Library
If you have set up your price list (Financial > Price Lists), the prices for materials and edge profiles will auto-populate based on your saved rates.
4.7 Step 6: Price Details & PDF Export
Goal: Review the complete quote with itemized pricing and export to PDF.
Quote Summary
The final step displays a detailed breakdown:
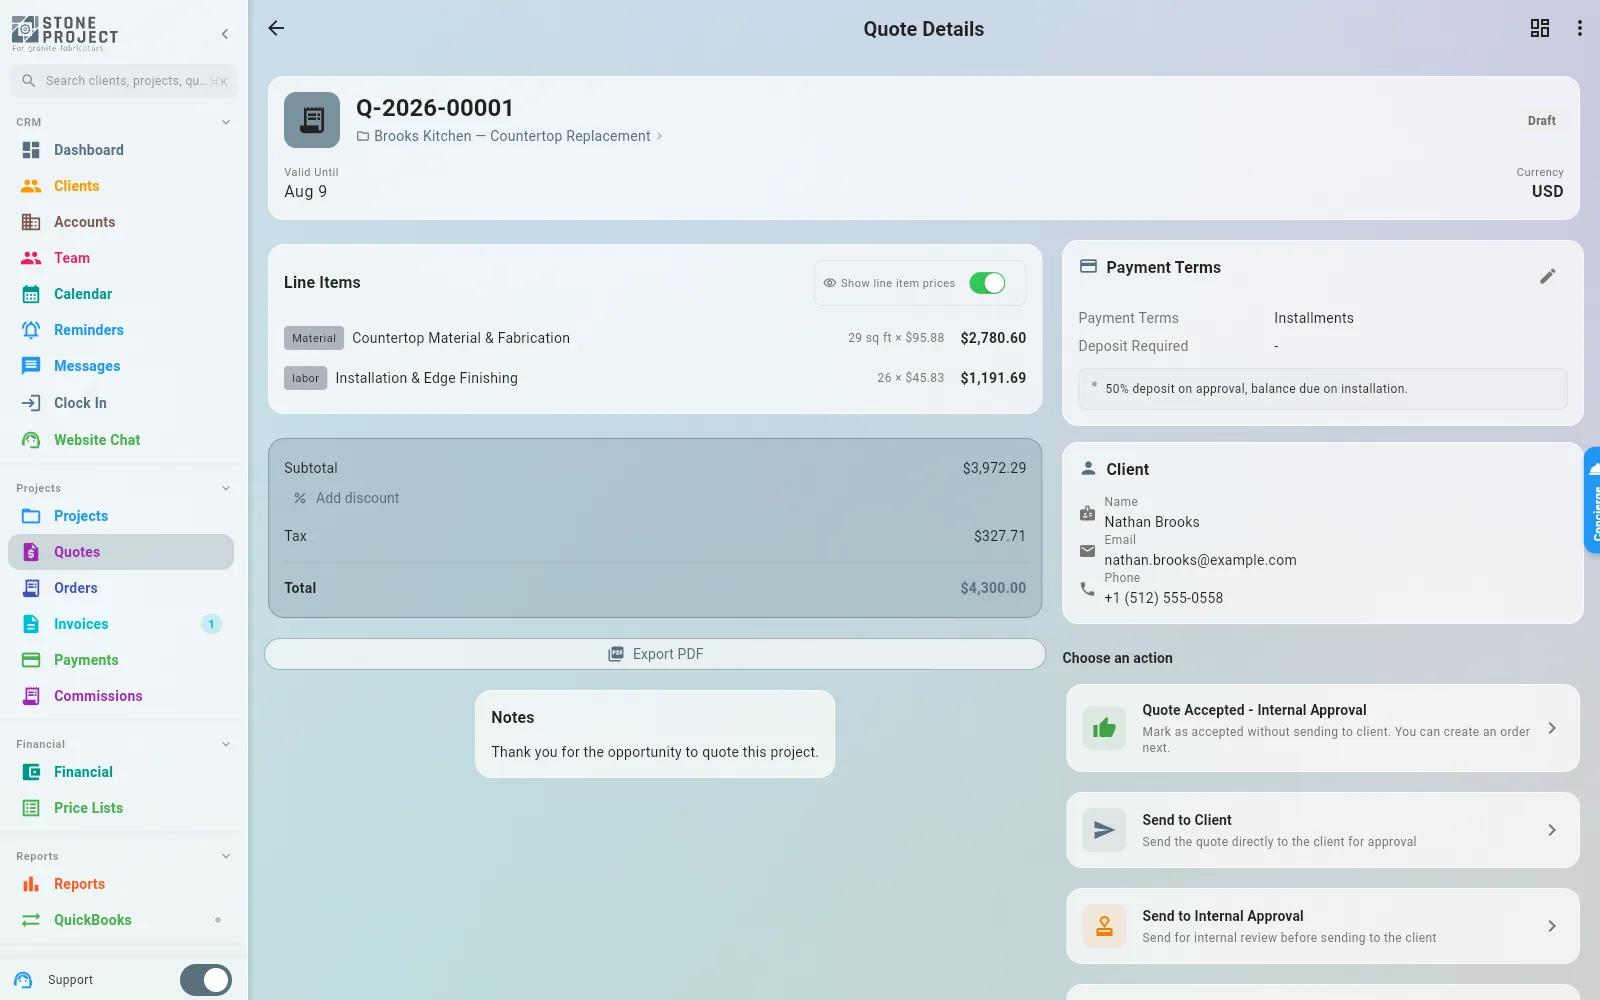
| Item | Details |
|---|---|
| Material | Selected stone, price per sq ft |
| Total Area | Calculated area of all countertop shapes |
| Edge Profiles | Linear footage and price per profile type |
| Backsplash | Area and pricing |
| Cutouts | Number and type of cutouts with pricing |
| Subtotal | Sum of all items |
| Tax | Based on your tax rate settings |
| Total | Final quoted amount |
Editing a Price on a Line
Every priced line shows two numbers you can tap: the unit price (per sq ft or per linear ft, next to the description) and the line total (on the right). They are one price seen two ways, so they always move together:
| You type... | What happens |
|---|---|
| A unit price | The total becomes unit price × quantity |
| A total | The unit price becomes total ÷ quantity, and the line is pinned at exactly the amount you typed. The editor shows the implied rate live under the field while you type |
| A discount % in the total editor | Applied to the line's current price (not compounded with a % saved before), and the unit price follows |
| Reset in the unit-price editor | The line goes back to the price list — unit price and total |
| Reset in the total editor | Only offered when the pinned total no longer matches unit price × quantity (for example after the drawing changed size). It drops the pin so the total follows the rate again |
The manual badge appears only when a pinned total stopped matching unit price × quantity — the drawing grew or shrank after the total was typed. Hover or tap it to see both amounts.
Who changed this price? Every price editor on a job (the unit price and the total of a line, a material option, and the stone price in Material & Color) lists under the field the last changes to that price: date and time, who made it, and from what to what. Price List there means the line was following the price list at that moment. For a stone, the changes to its catalog price show up in the same list, marked Price List:. Only changes made since September 10, 2026 are listed; earlier edits were not recorded.
I changed the unit price and the total did not move
Before September 2026 a pinned total kept winning silently after a unit-price edit. Today the two numbers are linked: whichever you typed last is what the line bills.
The Options Bar Above the Price Details
The row of controls at the top of the price details screen changes this drawing only. Three of them answer questions people ask often:
| Control | What it does |
|---|---|
| Group identical cutouts and sinks | Two identical sink cutouts stop taking two lines that read the same. They collapse into one line with the quantity — Sink Cutout 2x $100 — on screen and in the PDF |
| Tax | Pick one of your tax rates, or Custom tax rate at the bottom of the list to type a percentage that applies to this drawing alone. Leave it on -None- for no tax |
| Show Price Details | Whether the PDF carries the line-by-line breakdown or only the total (see below) |
I turned the setting on in Settings and my quote did not change
Nothing was lost. The company defaults under Settings > Drawing & Documents > PDF Settings are applied when a drawing or a quote is created, so they take effect on the next one you make and never rewrite documents that already exist. To fix the job in front of you, flip the same control in this options bar and generate the quote again.
Why a Small Area Is Billed for More Square Feet
A 5.69 sq ft area billed as 10 sq ft is not a rounding bug: it is the Minimum Square Footage, a company-wide floor on the square footage charged for fabrication and installation. See 22.15 Minimum Square Footage for where to change it and what area it counts.
The opposite surprise has a different cause. A removal, template or delivery added through Add Other Item and priced per area does not follow that floor and does not add the backsplash on its own: the quantity field is prefilled with the countertop square footage only. Under the field, two chips show both figures — countertop, and countertop + backsplash — and one tap fills the one you want. A removal usually covers both.
Exporting the Quote
- Tap Generate PDF to create a professional quote document.
- The PDF includes:
- Your company logo and contact info
- Client name and project details
- Visual layout drawing
- Itemized pricing breakdown (configurable — see below)
- Terms and conditions (customizable in Settings)
- Share the PDF via email, messaging apps, or save to files.
- Print the PDF directly from the app.
Show / Hide Price Details
You can control whether the PDF shows the full itemized breakdown or only the total amount:
- In the quote summary, toggle Show Price Details to include or exclude the line-by-line pricing.
- This is useful when you want to send a quote with just the total price and hide the per-item costs.
- The default setting can be configured per-company in Settings > Quote Settings > Default Show Price Details.
Stale Price Detection
Prices Out of Date
If your Price Library has been updated since the quote was created, the system will alert you that some prices may be outdated.
When you open a quote with stale prices:
- A warning banner appears indicating that pricing has changed.
- Tap Review Price Updates to see which items are affected.
- Choose to Apply Selected Updates to refresh prices to current rates, or keep the original prices.
- This ensures your quotes always reflect your latest pricing without unexpected changes.
4.8 AI Drawing Assistant
Pro Feature
The AI Drawing Assistant requires an active Pro subscription.
The AI Drawing Assistant helps you create countertop drawings from photos or sketches:
- Tap the AI icon in the Drawing Tool toolbar.
- Upload a photo of an existing countertop, hand-drawn sketch, or floor plan.
- The AI analyzes the image and generates a countertop layout on the canvas.
- Review and adjust the generated shapes, dimensions, and positions.
This is useful for quickly creating drawings from on-site photos or client-provided sketches, saving time compared to manual drawing.
4.9 DXF Import & Export (CAD Integration)
Pro Feature
DXF import and export require an active Pro subscription.
Stone Project supports DXF file format for seamless integration with CAD/CAM software used in stone fabrication.
Importing DXF Files
Import countertop drawings from CAD software:
- Open the Drawing Tool (Quotes → New Quote, or from a Project).
- In the top toolbar, tap Import CAD. On a phone, swipe that bar to the right if the button is off-screen. There is no three-dot menu for this.
- Choose AutoCAD DXF (.dxf).
- Pick the units of the file, then pick a
.dxffile from your device (or drag and drop on desktop/web). - The app converts the DXF entities into editable countertop shapes. Review and adjust as needed.
I imported the DXF and nothing shows up on the canvas
The import almost always worked — the drawing is just tiny, or somewhere you are not looking. It is a units problem: a file drawn in metres and imported as centimetres arrives 100 times too small (a 46 x 82 cm piece becomes 0.18 inch wide). Import it again and pick the unit the file was really drawn in; metres is on the list and is suggested automatically when the sizes look like metres. Drawings placed far from the origin (a full site plan, kilometres away from 0,0) are brought back to the canvas by the import.
If it still comes in empty, the file has no closed outlines: in AutoCAD run PEDIT on the lines, Join, then Close, and export again as DXF R12.
Stone Project does not import AutoCAD .dwg files. From AutoCAD, use Save As / Export and choose DXF R12 (AutoCAD R12 DXF).
Supported DXF Versions
Stone Project supports DXF R12 format, which is compatible with virtually all CAD software. When exporting from your CAD program, choose "DXF R12" or "AutoCAD R12 DXF" for best compatibility. .dwg is not imported.
Exporting DXF Files
Export your countertop drawing for use in CAD/CAM software:
- In the Drawing Tool, go to the final step (Price Details).
- Tap Export or open the export dialog.
- Select DXF as the export format (along with PNG and PDF options).
- Configure export settings:
- Include layers — Separate countertop shapes, cutouts, and dimensions into DXF layers.
- Tap Export DXF to generate and share the file.
DXF Compatibility
DXF files exported from Stone Project are compatible with:
| Software | Type |
|---|---|
| AutoCAD | General CAD |
| SolidWorks | 3D CAD |
| Fusion 360 | CAD/CAM |
| SketchUp | 3D Modeling |
| CNC routers | Fabrication machines |
| Most other CAD/CAM tools | Industry standard |
DXF Settings
Configure DXF export preferences in Settings > Drawing Settings > DXF Settings to customize layer names, units, and other options for your workflow.
4.10 Shape Library
Save and reuse custom countertop shapes across projects with the Shape Library.
Saving Shapes to the Library
- Select one or more shapes on the canvas.
- Right-click (or long-press) and choose Save to Library.
- Enter a name and optional description for the shape.
- Choose a folder to organize it (or create a new folder).
- Tap Save.
Browsing the Shape Library
- In the Drawing Tool, tap the Shape Library button in the toolbar.
- Browse shapes by folder, or use the search bar to find shapes by name.
- Switch between grid view (thumbnails) and table view (list with details).
- Tap a shape to preview it, then tap Insert to add it to the current drawing.
Organizing Your Library
| Action | How To |
|---|---|
| Create Folder | Tap "New Folder" in the library dialog |
| Rename Folder/Item | Right-click or long-press > Rename |
| Move Item | Right-click or long-press > Move to Folder |
| Delete Item | Right-click or long-press > Delete |
Build Your Template Collection
Save commonly used layouts (L-shape kitchens, bathroom vanities, bar tops) to your Shape Library to speed up future projects. Each fabrication shop tends to have recurring shapes — build your library over time.
4.11 Reference Images
Overlay reference images on the drawing canvas for tracing or comparison:
- In the Drawing Tool, tap the Reference Image button in the toolbar.
- Upload a floor plan, sketch, or photo.
- The image appears as a semi-transparent overlay on the canvas.
- Adjust the position, scale, and opacity of the image.
- Draw your countertop shapes on top of the reference image.
This is ideal for tracing layouts from architectural floor plans or client-provided sketches.
4.12 Seam Placement
Define seam lines where countertop sections will join:
- Complete the first four drawing steps, then open Step 5: Material & Color. The seam command is not shown while you are in Draw Shape, Corners & Curves, Edge & Backsplash, or Cutouts.
- On web or desktop, right-click the countertop shape on the canvas. On a phone or tablet, long-press it.
- Choose Define Seams from the shape menu.
- In the dialog, choose the orientation, tap Add Seam, then select the new line and set its Seam Position. The field uses your selected unit system, so a Metric workspace accepts centimeters.
- Save the dialog. Seam costs are automatically calculated and included in the quote pricing.
Seam Placement Best Practices
Place seams at inconspicuous locations, away from high-visibility areas. The tool helps you visualize where seams will fall relative to sinks, cooktops, and visible edges.
4.13 Slab Layout & Material Optimization
Visualize how your countertop shapes fit onto actual stone slabs:
- Configure your slab dimensions (width and length) in the drawing settings.
- Add slabs by tapping Add Slab — you can specify the material and dimensions for each.
- The system shows how your countertop shapes will be cut from the slabs.
- Adjust slab positions and rotations to minimize waste.
- The Slabs Needed count updates in real-time as you optimize the layout.
To keep vein sequence, drag the countertop on the slab. Waterfalls, backsplashes and mitered strips on that same slab move with it so the origin is not lost. Dragging a waterfall by itself still moves only that piece. Pieces stay on the plate: drop them onto the next slab card to change plates, not into the gap between cards.
The fullscreen button on the Slabs column keeps the live preview beside the plates, so both stay on screen.
Slab Management
| Action | Description |
|---|---|
| Add Slab | Add a new slab with specified dimensions |
| Edit Slab | Change slab name, dimensions, or material |
| Delete Slab | Remove a slab from the layout |
| Position Image | Upload a slab photo and position it for visual matching |
This feature helps fabricators estimate material needs, reduce waste, and plan efficient cutting layouts.
Magic Auto-Layout
Use Magic Auto-Layout to generate a proposed placement for the pieces in one area:
- Open Step 5: Material & Color and select a material/color for the area.
- In the Slabs column, tap Magic Auto-Layout at the bottom.
- Review the proposed placement, then accept it only if it suits the job.
The button is enabled only when the area has at least one shape and a selected material/color. You can add slabs first when you want to use specific stock, but it is not required: the tool uses existing slabs before previewing additional standard-sized slabs.
Piece longer than the slab
If a piece does not fit on a single slab, Magic Auto-Layout adds the seam for you and the preview shows both parts placed on the slab, so you can see where the cut lands before accepting. To fine-tune it, right-click the piece and choose Define Seams: the size of each section updates live as you move the pointer, and the larger section must stay a few inches (or centimeters) shorter than the slab length.
4.14 Drawing Export Options
Export your countertop drawing in multiple formats:
- In the Drawing Tool, tap Export on the final step.
- Choose your format:
| Format | Use Case |
|---|---|
| PNG | Share as an image (adjustable quality/scale) |
| Professional document with drawing and pricing details | |
| DXF | CAD/CAM file for fabrication software and CNC machines |
- Configure export options:
Export Options
| Option | Applies To | Description |
|---|---|---|
| Areas | All | Drawings with more than one area list a checkbox per area. Uncheck the ones to leave out; the preview and the file follow. Pick a single area and the file is named after it, so exporting room by room doesn't overwrite files |
| Include Grid | PNG, PDF | Show the background grid in the exported image |
| Include Dimensions | PNG, PDF, DXF | Display dimension labels on each edge. In a DXF they are text on their own DIMENSIONS layer, so you can hide or freeze it in your CAD/CAM software before cutting |
| Dimension Font Size | PNG, PDF | Adjust dimension label size (slider: 6–20, default: 11) |
| Include Annotations | PNG, PDF | Show text annotations and labels you added to the canvas |
| Annotation Font Size | PNG, PDF | Adjust annotation text size (slider: 4–14, default: 7) |
| Include Header | PNG, PDF | Add a header with company logo and project info |
| Transparent Background | PNG | Export with a transparent background instead of white |
| Image Quality | PNG | Adjust output resolution (higher quality = larger file) |
| Include Layers | DXF | Separate shapes, cutouts, and dimensions into DXF layers |
- Tap Export to generate the file.
- Share via email, messaging apps, or save to your device.
Font Size Customization
Adjusting dimension and annotation font sizes is especially helpful when exporting drawings for print or presentations where readability matters. Larger font sizes make dimensions easier to read on printed shop drawings.
4.15 Split Shapes
Split a countertop shape into multiple sections:
- Select a shape on the canvas.
- Tap Split Shape from the context menu.
- Define the split line position.
- The shape is divided into two independent shapes that can be moved, resized, and priced separately.
This is useful when a countertop needs to be fabricated in multiple pieces due to size constraints or seam requirements.
4.16 Drawing Revision History
Track changes to your drawing over time:
- In the Drawing Tool, tap the Revisions button (history icon).
- View a list of all saved revisions with:
- Revision number
- Date and time
- Author who made the change
- Notes describing what changed
- Summary of changes (shapes added/removed, cutouts, etc.)
- Tap a revision to preview it.
- Tap Restore to revert the drawing to a previous version.
Revision Notes
Add notes when saving to help you and your team understand what changed in each revision. This is especially useful when collaborating on complex projects.
Revisions are not copies
A revision is a point in the history of one drawing, and restoring one replaces what is on the canvas. To keep two options alive side by side — a different material, a different layout — duplicate the drawing instead: see Alternative Versions.
4.17 Working with the Canvas
Navigation
| Action | Touch | Desktop |
|---|---|---|
| Pan | Two-finger drag | Click and drag on empty space |
| Zoom In | Pinch outward | Scroll up or + key |
| Zoom Out | Pinch inward | Scroll down or - key |
| Fit to Screen | Double-tap empty area | Press F key |
Toolbar
The toolbar (visible in Steps 1, 2, and 4) provides quick access to:
| Tool | Description |
|---|---|
| Quick Draw | Add pre-defined shapes |
| Text | Add text labels and annotations |
| Undo | Undo the last action |
| Redo | Redo an undone action |
| Save | Save the current drawing |
| Help | Open the drawing tutorial |
Bottom Status Bar
The status bar at the bottom shows real-time information:
- Total area of all shapes
- Number of shapes on the canvas
- Number of cutouts
- Running price estimate (when material is selected)
4.18 Quick Draw Shapes
Quick Draw provides pre-defined shape templates that you can add and customize:
| Shape | Use Case |
|---|---|
| Rectangle | Straight countertop sections, bathroom vanities |
| L-Shape | Corner kitchen counters |
| U-Shape | Three-wall kitchen layouts |
| Polygon | Custom multi-sided countertop shapes |
| Ellipse | Round tables, curved bar tops |
| Freeform | Irregular or organic shapes |
After adding a Quick Draw shape:
- Resize by dragging handles or entering exact dimensions.
- Rotate as needed for your layout.
- Position relative to other shapes on the canvas.
4.19 Tips & Best Practices
- Start with the largest shape and build outward to smaller sections.
- Use text labels to clearly identify each area (helps when reviewing with clients).
- Double-check dimensions before moving to the next step — accuracy matters for pricing.
- Save frequently — the drawing auto-saves, but manual saves provide extra security.
- Use the tutorial the first time — tap the Help icon to walk through each feature.
- Review the PDF before sending to a client — make sure all dimensions and pricing are correct.
4.20 One editor at a time
Only one person can edit a project drawing at a time. If someone else already has it open:
- You will see Drawing in use with their name.
- Choose Open view-only to look without changing anything, or Open and request access to ask them to hand it over.
- The grant/decline prompt appears only on the current editor's screen — never on yours. While you wait, the canvas stays read-only.
- If they grant access, you become the editor (the drawing reloads so you see their latest save). If they decline, you stay in view-only.
- You cannot approve your own request.
If two people somehow end up changing the same drawing, the server refuses the second save rather than silently overwriting. Use Revision history (section 4.16) if you need to compare or restore a previous version.